Deploying Blueprints
Launching from a Blueprint
When you first access the web console on http://127.0.0.1:8081 you will be greeted by the GUI homepage comprised of:
- the quick launch panel
- links to UI modules
We’ll start by deploying an application via a YAML blueprint consisting of the following layers.
- MySQL DB
- Dynamic web application cluster
- Nginx load balancer
- Tomcat app server cluster
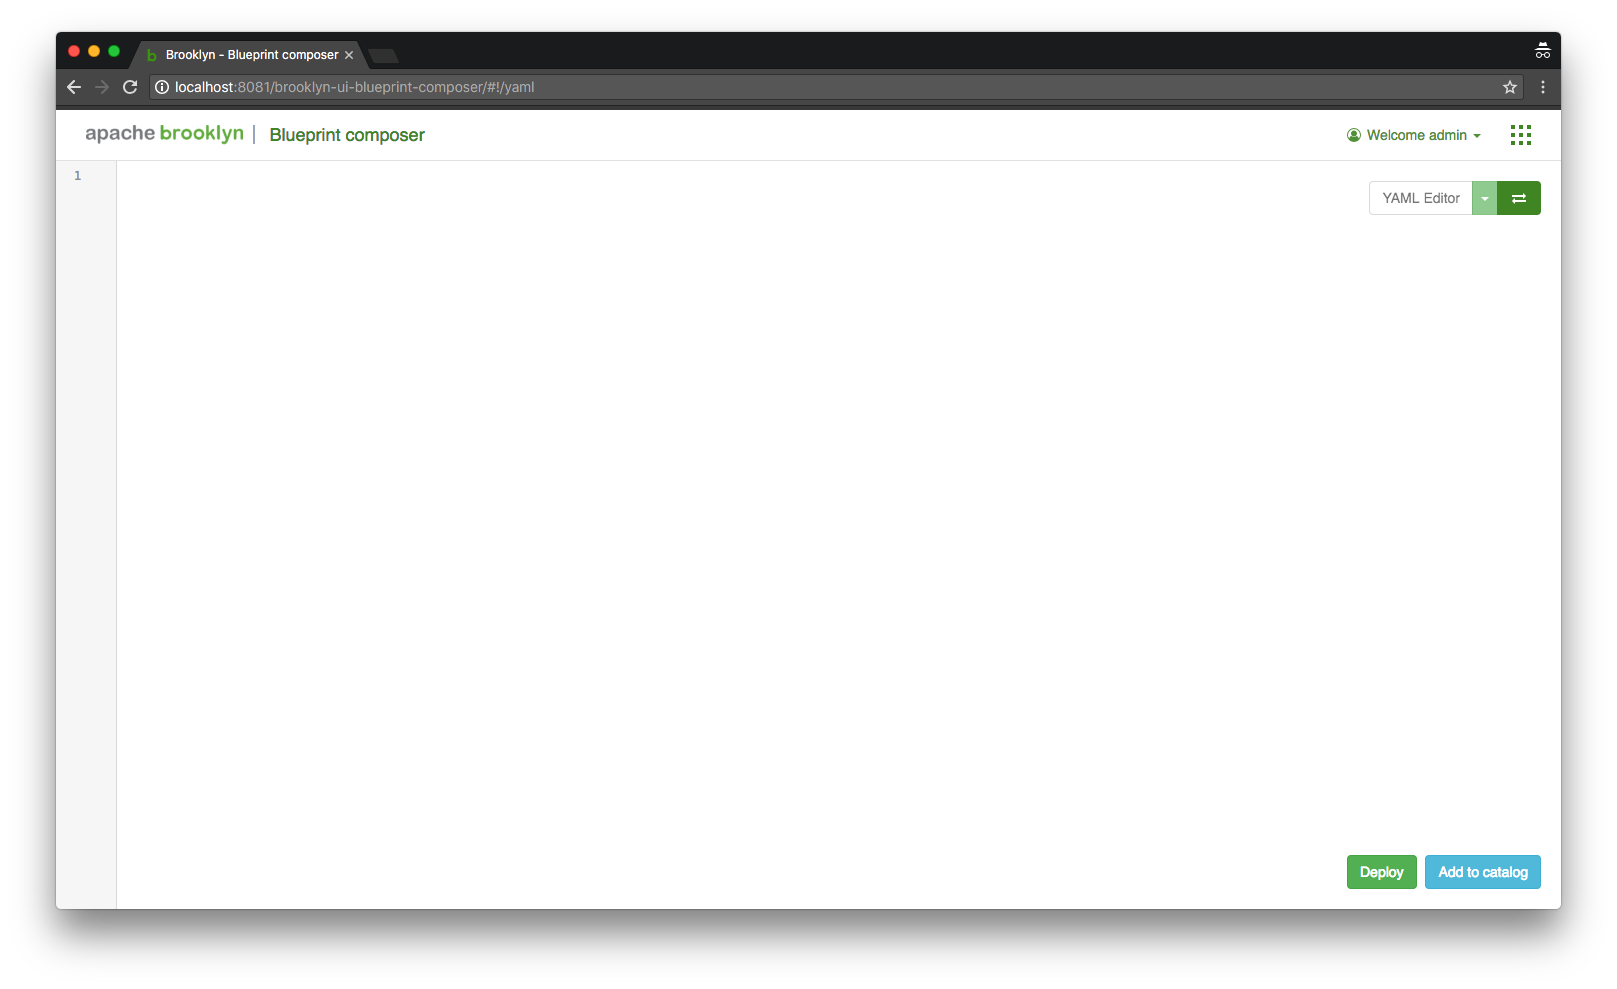
Go the “Blueprint Composer” and switch to the YAML editor view (by clicking on the double horizontal arrows icon on the top right corner) and copy the blueprint below into the editor.
But before you submit it, modify the YAML to specify the location where the application will be deployed.
name: My Web Cluster

location:
  jclouds:aws-ec2:
    identity: ABCDEFGHIJKLMNOPQRST
    credential: s3cr3tsq1rr3ls3cr3tsq1rr3ls3cr3tsq1rr3l

services:
- type: org.apache.brooklyn.entity.webapp.ControlledDynamicWebAppCluster
  name: My Web
  id: webappcluster
  brooklyn.config:
    wars.root: https://search.maven.org/remotecontent?filepath=org/apache/brooklyn/example/brooklyn-example-hello-world-sql-webapp/0.12.0/brooklyn-example-hello-world-sql-webapp-0.12.0.war # BROOKLYN_VERSION
    java.sysprops:
      brooklyn.example.db.url: >
        $brooklyn:formatString("jdbc:%s%s?user=%s&password=%s",
        component("db").attributeWhenReady("datastore.url"),
        "visitors", "brooklyn", $brooklyn:external("brooklyn-demo-sample", "hidden-brooklyn-password"))
- type: org.apache.brooklyn.entity.database.mysql.MySqlNode
  name: My DB
  id: db
  brooklyn.config:
    creation.script.password: $brooklyn:external("brooklyn-demo-sample", "hidden-brooklyn-password")
    datastore.creation.script.template.url: https://bit.ly/brooklyn-visitors-creation-script
Replace the location: element with values for your chosen target environment, for example to use SoftLayer rather than AWS (updating with your own credentials):
location:
  jclouds:softlayer:
    identity: ABCDEFGHIJKLMNOPQRST
    credential: s3cr3tsq1rr3ls3cr3tsq1rr3ls3cr3tsq1rr3l
With the modified YAML, click on the “Deploy” button. AMP will begin deploying your application and redirect you to the “Inspector”. In this screen, you will see your application as “Starting”.
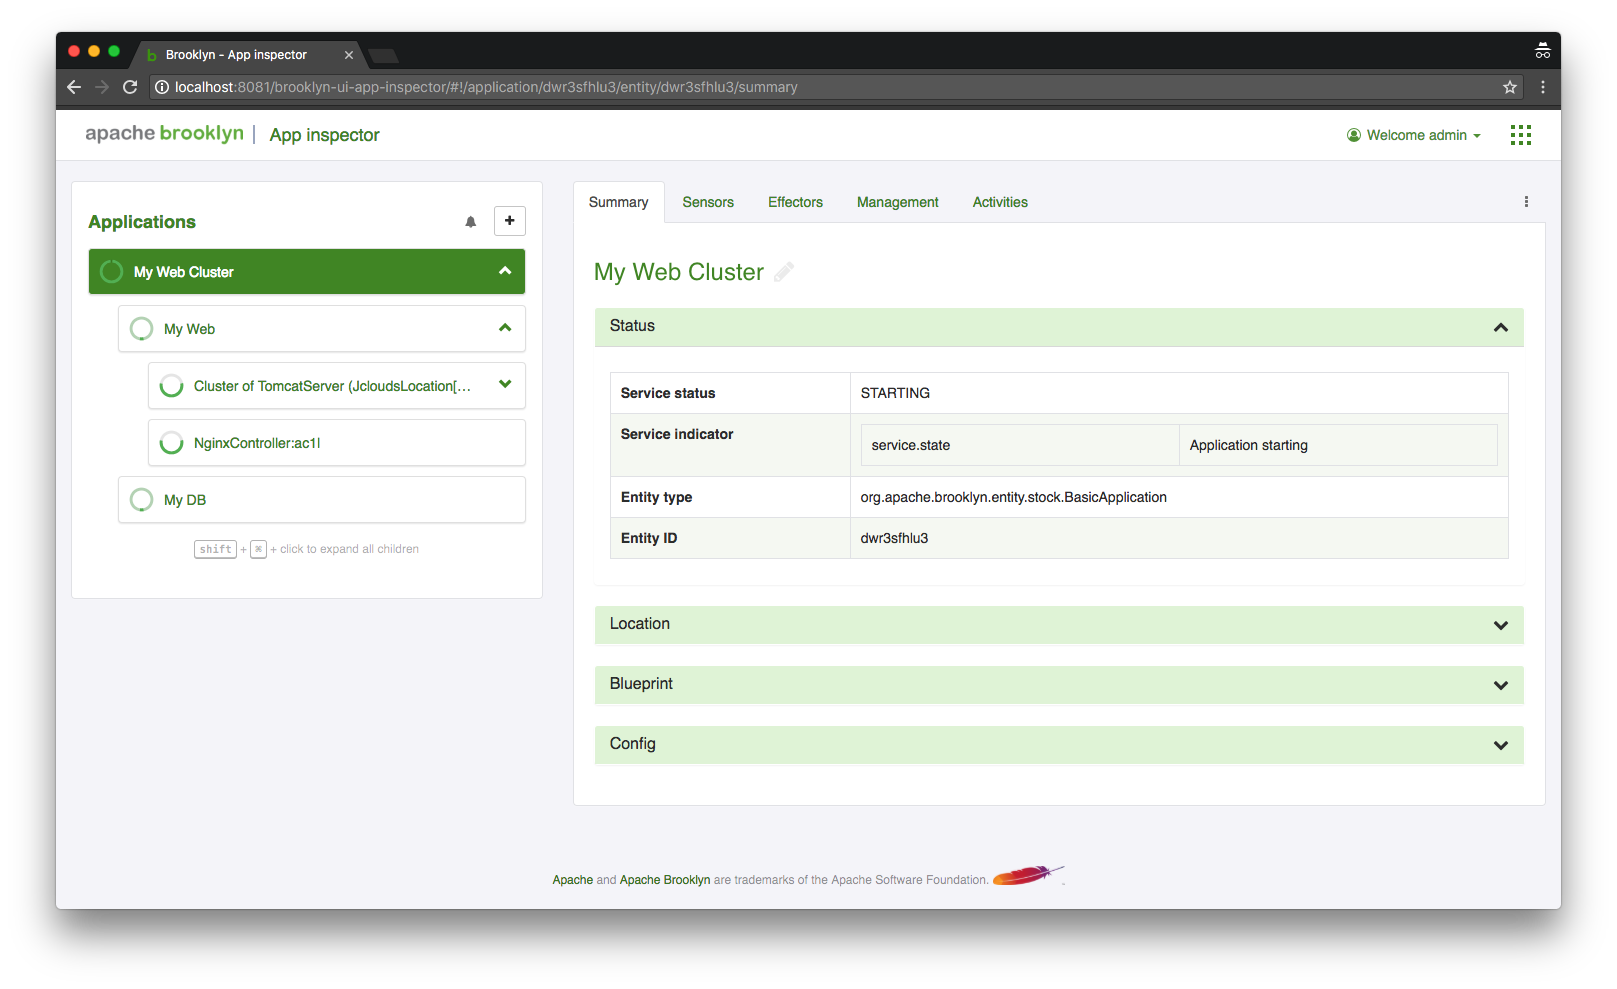
Depending on your choice of location it may take some time for the application nodes to start, the next page describes how you can monitor the progress of the application deployment and verify its successful deployment.
Launching from the Catalog
Instead of pasting the YAML blueprint each time, it can be added to the AMP Catalog where it will be accessible from the “Quick Launch” panel or “Catalog” and “Blueprint Composer” UI modules.

Next
So far we have touched on AMP’s ability to deploy an application blueprint to a cloud provider.
The next section will show how to Monitor and Manage Applications.