1 Deploying an AMP blueprint
This exercise will introduce Cloudsoft AMP, will take about 20 minutes, and by the end you will understand the basics of AMP blueprints and deployments.
A simple deployment
An application blueprint in Cloudsoft AMP consists of one or more services which AMP will manage.
A service component is defined by specifying an AMP type and optionally a name and a configuration in brooklyn.config.
The blueprint below uses the terraform type to deploy a Terraform template to create an S3 bucket in AWS.
Before deploying, let’s explore some of the main concepts:
name: Cloudsoft AMP S3 Bucket

services:
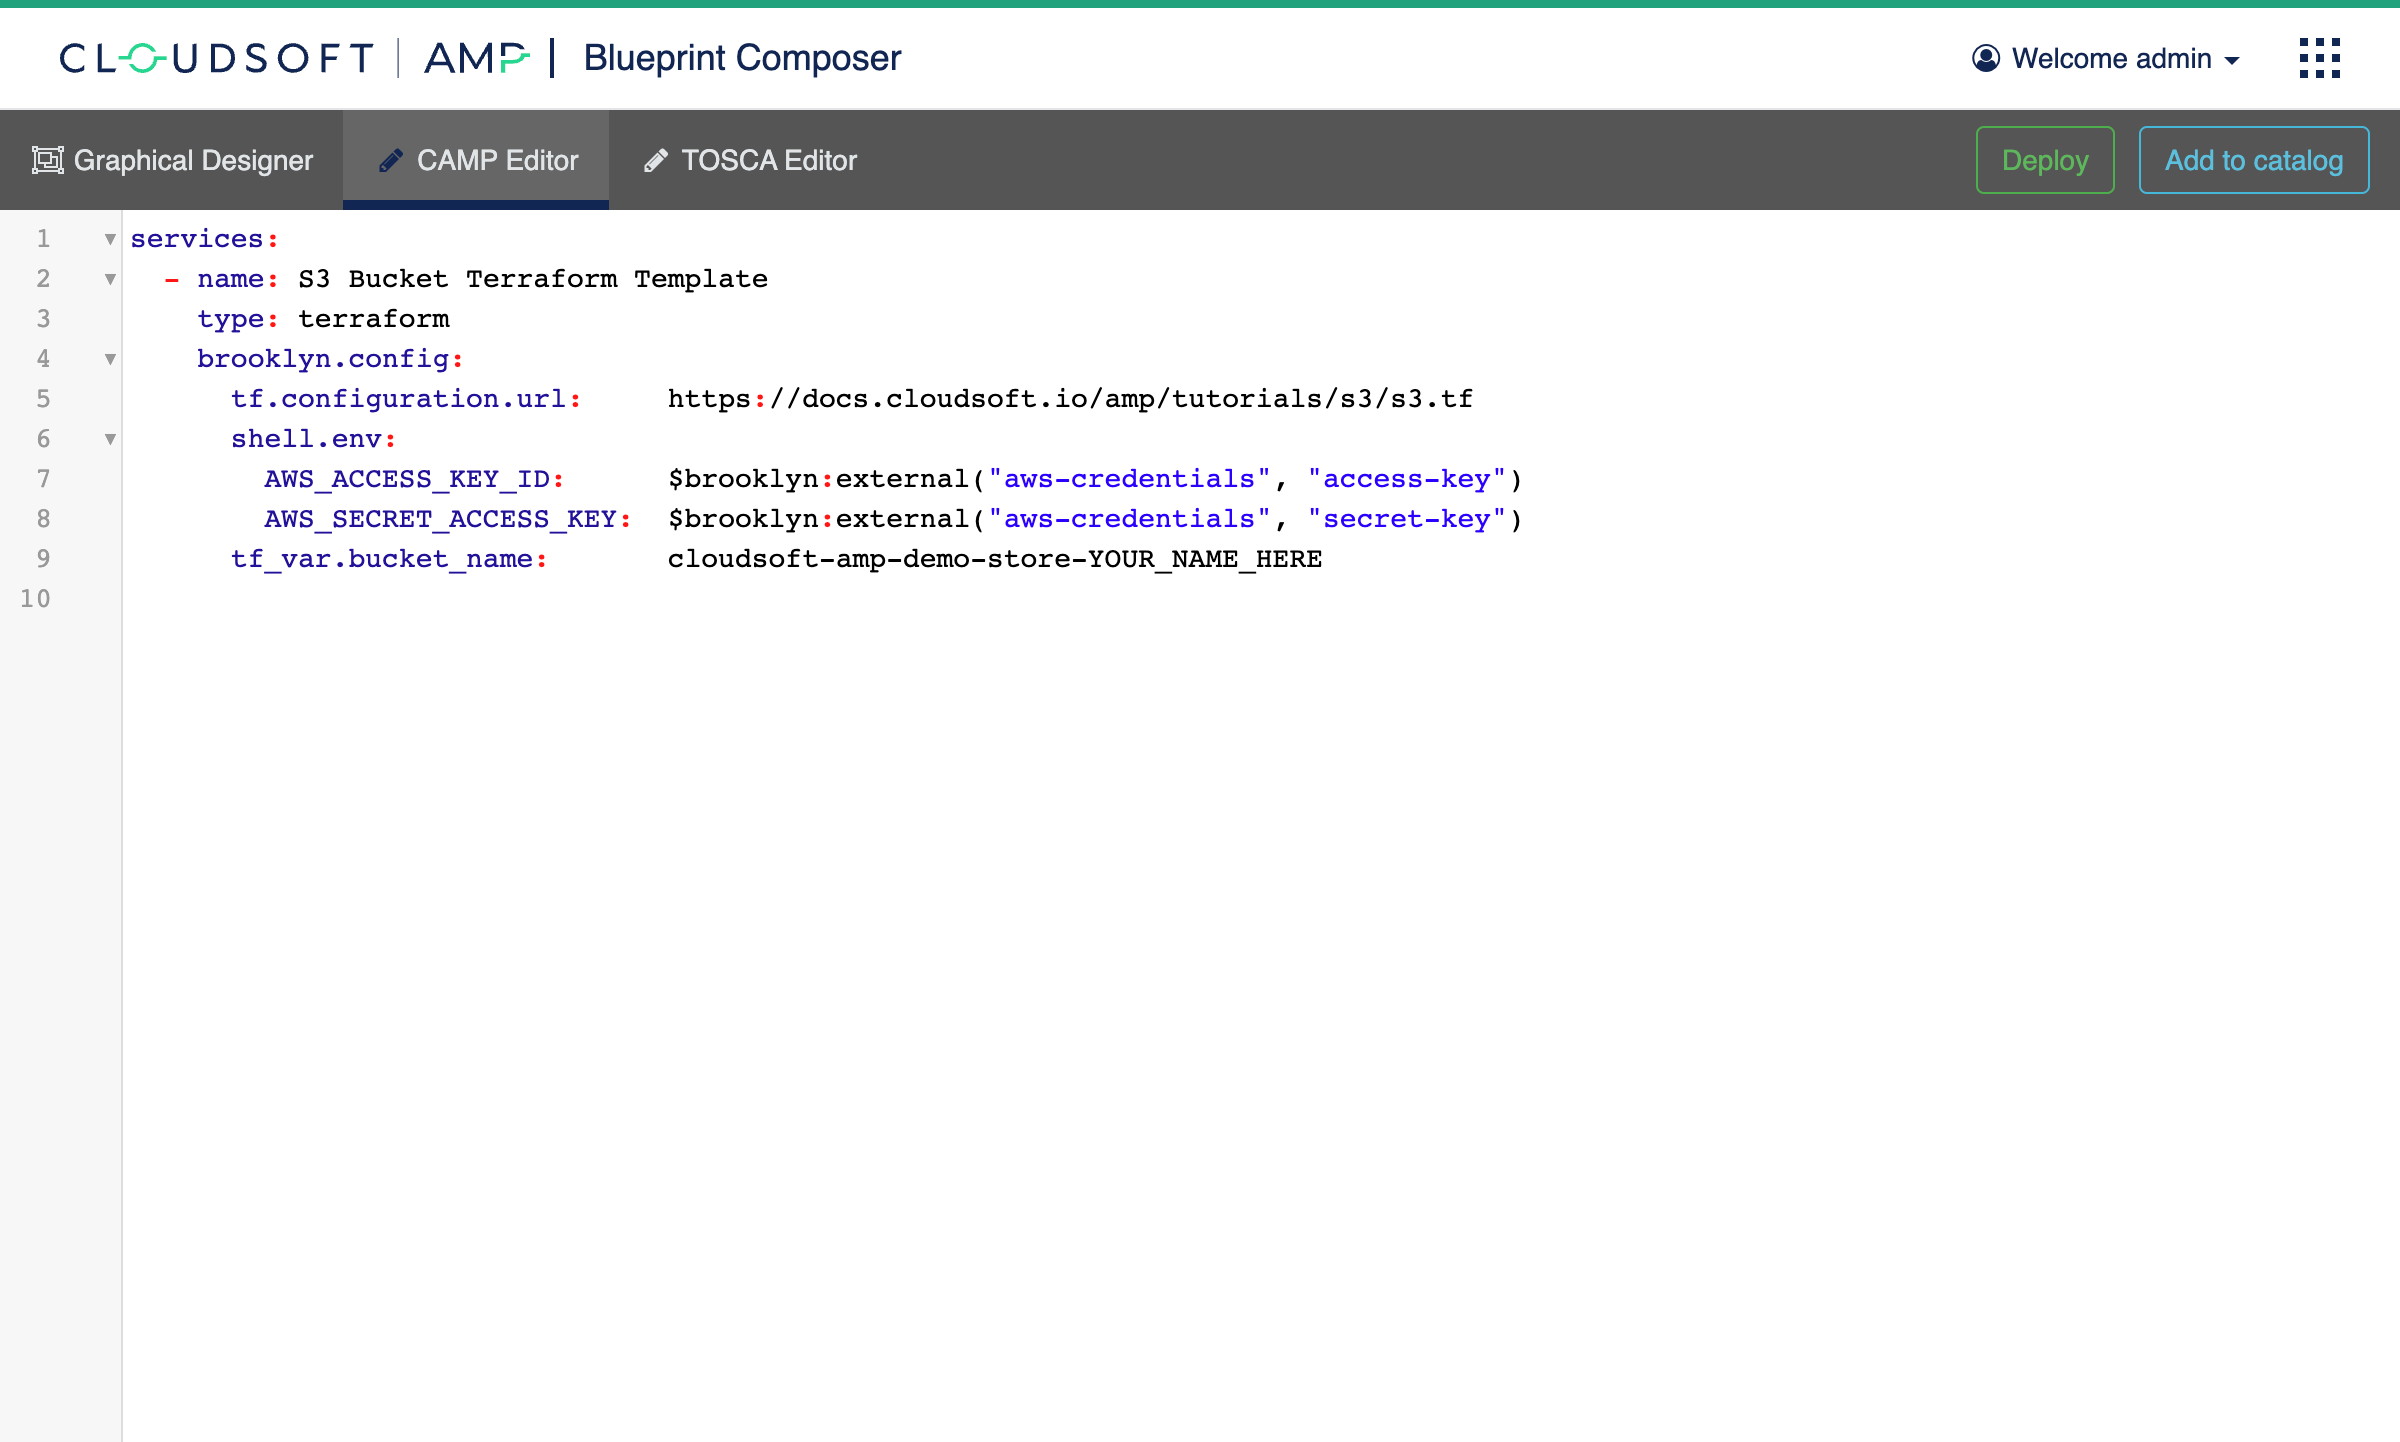
  - name: S3 Bucket Terraform Template
    type: terraform
    brooklyn.config:
      tf.configuration.url:     https://docs.cloudsoft.io/tutorials/exercises/1-basic-s3-terraform/s3/s3.tf
      shell.env:
        AWS_ACCESS_KEY_ID:      $brooklyn:external("exercise-secrets", "aws-access-key-id")
        AWS_SECRET_ACCESS_KEY:  $brooklyn:external("exercise-secrets", "aws-secret-access-key")
      tf_var.bucket_name:       cloudsoft-amp-exercises-store-YOUR_NAME_HERE
The blueprint here defines an “application” called “Cloudsoft AMP S3 Bucket”,
containing one service entity. An entity can represent anything from low-level infrastructure resources
or a managed service to conceptual part of the application’s architecture,
containing other service entities.
Here, the single service called “S3 Bucket Terraform Template” of type: terraform,
telling AMP it should use its Terraform support to create and manage that service entity.
The brooklyn.config block allows further configuration,
with the brooklyn prefix coming from the Apache Brooklyn project which is used as the engine driving AMP.
Here, we set three “config keys”.
You will be introduced to some of the other Apache Brooklyn elements used by AMP – including
brooklyn.children, brooklyn.policies, and brooklyn.initializers – later.
-
tf.configuration.urlpoints at the simple terraform template which will be deployed. -
shell.envallows shell environment variables to be specified in the blueprint. These are set whenterraformis executed by AMP.- Here, the
$brooklyndomain-specific language (DSL) is used, described in more detail later, so that AMP can securely retrieve credentials stored externally. This ensures that credentials are not exposed as plaintext in the AMP blueprint nor in the Terraform template, nor in memory when not in use. These externals should be set prior to this exercise.
- Here, the
-
tf_var.bucket_nameprovides the value for thebucket_namevariable needed by this Terraform template. The tokenYOUR_NAME_HEREis a placeholder which we will replace when we deploy.
Many other config keys are available, like configuring where terraform should run; by default it uses a container, and
the only requirement is that AMP is set up on a server with kubectl configured for use against the target Kubernetes
environment. All config keys can be found in the description of terraform type (named Terraform Configuration),
in the “Catalog” which we will see later.
 Using variables and setting tags
⌃
 More sophisticated Terraform templates
⌃
Deploy the blueprint
Let’s deploy this blueprint. For now we will do this by copy-and-pasting the AMP blueprint code:
- In Cloudsoft AMP, go to the “Blueprint Composer”, either from the main screen or using the module navigation button in the top right.
- Click on the “CAMP Editor” tab. This should bring up a text editor, for the “OASIS CAMP YAML” format we are using.
- Copy the blueprint shown above to the clipboard and paste it into the text editor.
- Switch to the “Graphical Designer” where you will see an editable graphical representation of the blueprint, with an oval for the application and a circle for the terraform node, along with a palette at left.
- Click on the circle for the terraform service. This will bring up a properties panel at right.
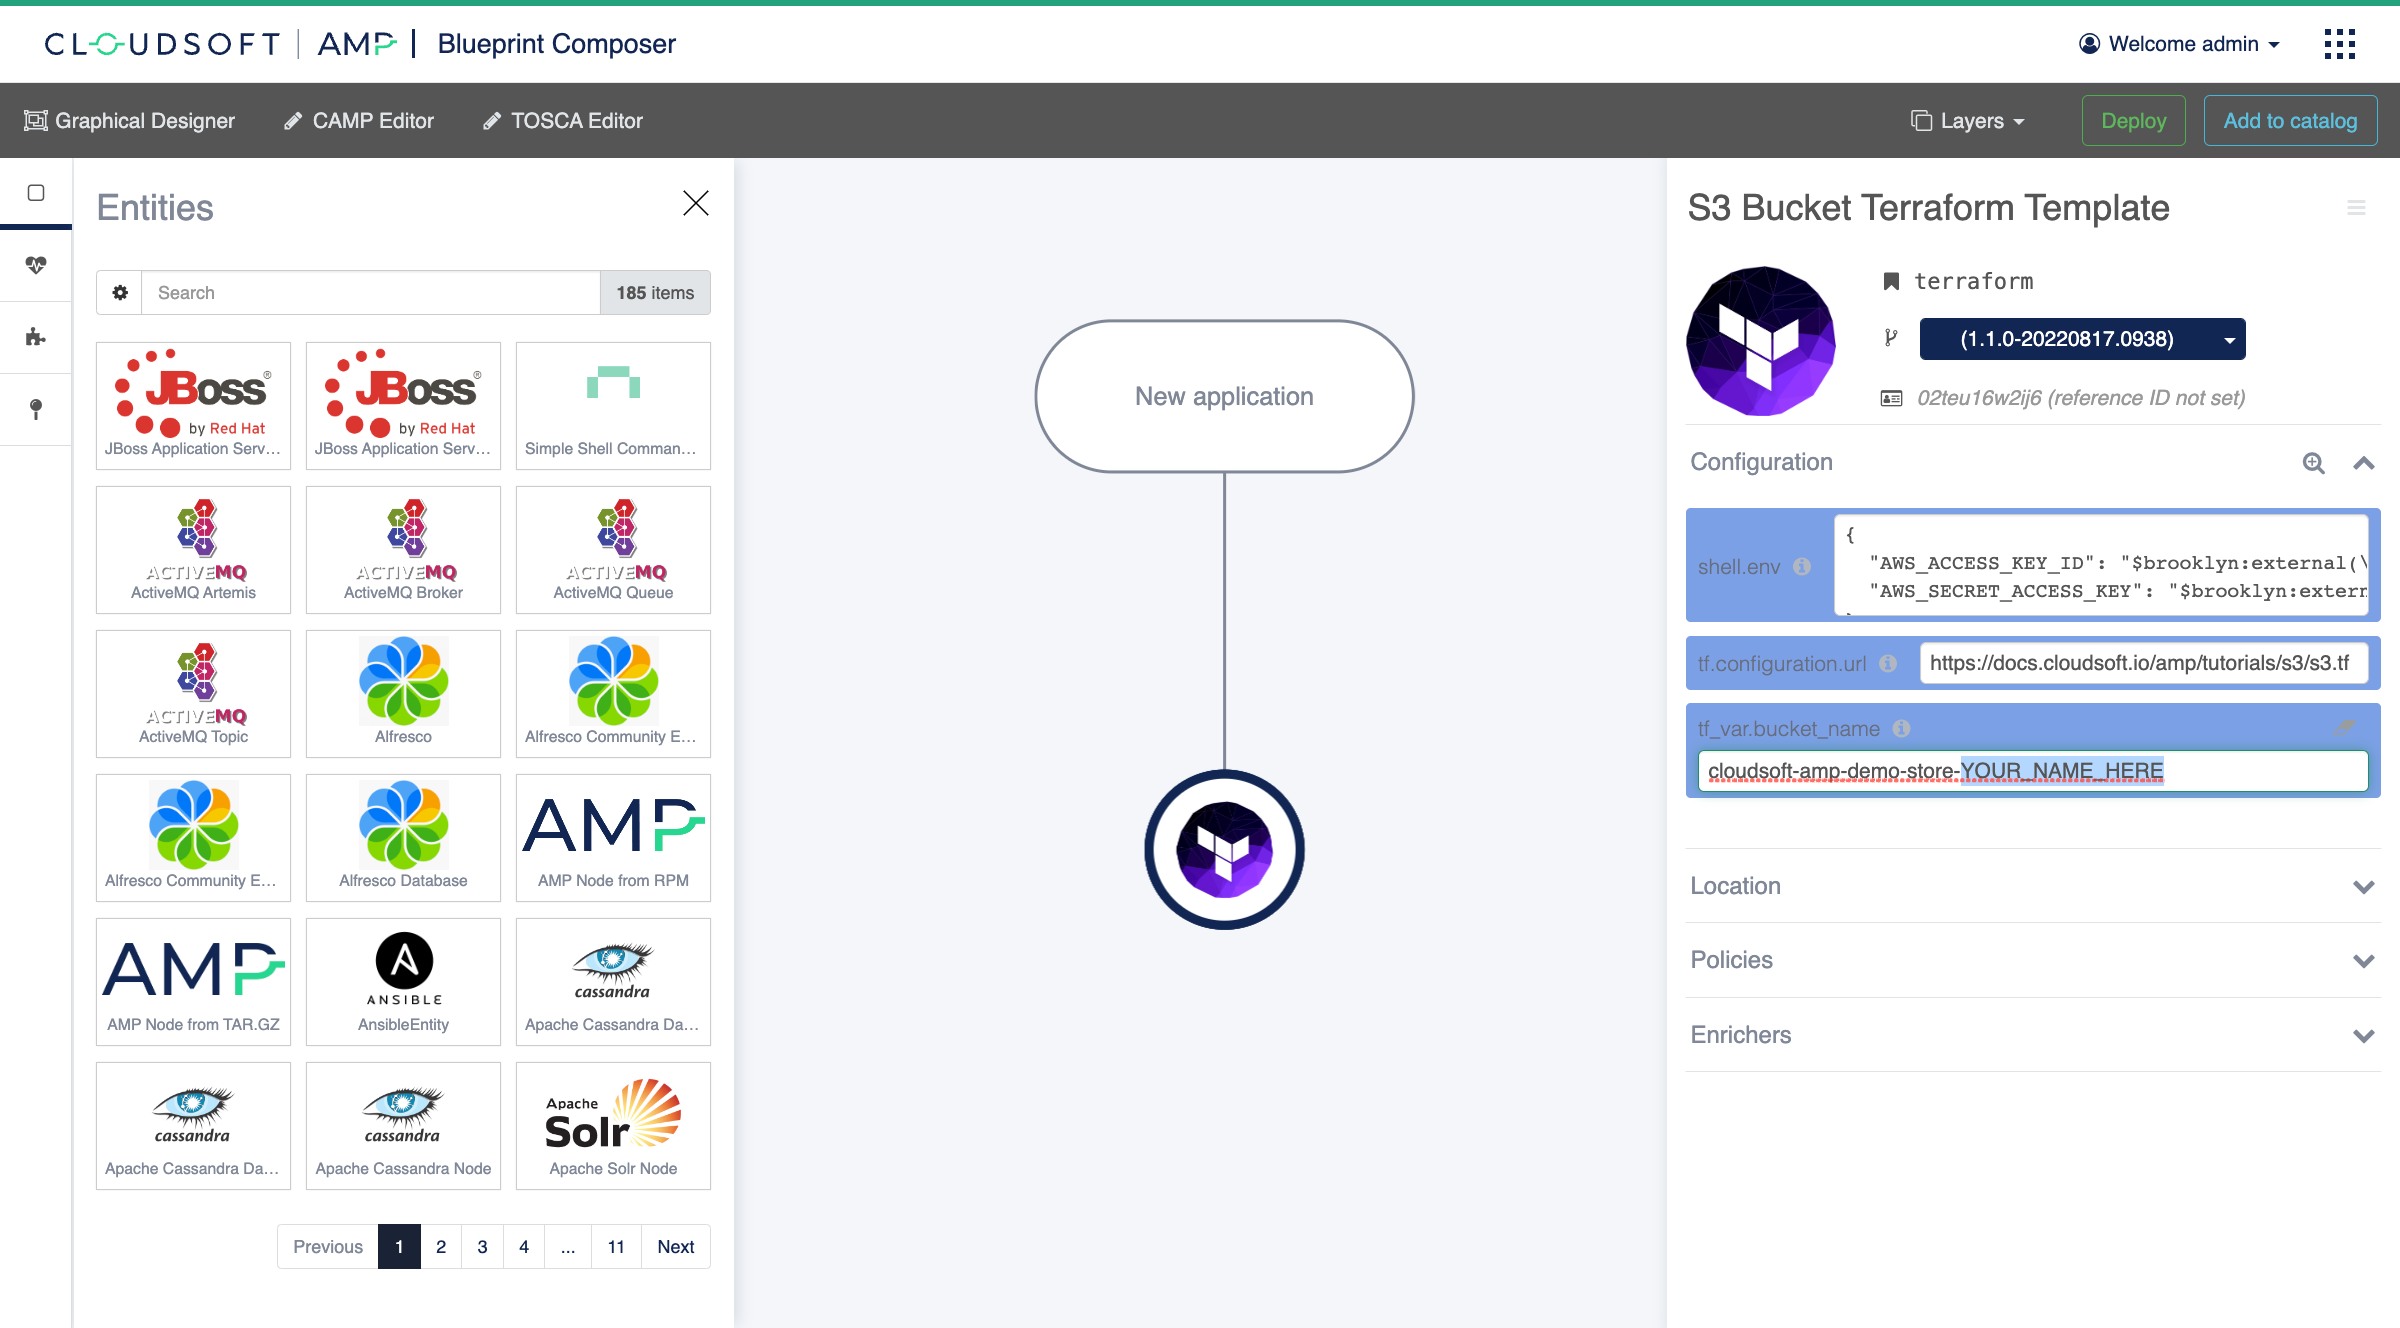
- Click on the
tf_var.bucket_nameconfig key value in the properties panel and change theYOUR_NAME_HEREtoken to something that identifies you, using characters that AWS S3 allows (lower case letters, numbers, and hyphens; no spaces!). - Click “Deploy” towards the top right of the screen.
Your blueprint for an S3 bucket will now be deploying.
Explore AMP
The above steps will take you to the “Dashboard” which gives a high-level view of applications, their health, compliance, and customizable selected key information, for a wide range of stakeholders. Further exercises will explore this; for now, we will first look at the technical underpinnings of the Cloudsoft AMP model, using the “Inspector”. In the AMP UI, there should be a button to “Open in Inspector”, or you can select it from the top-right module navigation button. Click one of these to bring up the “Inspector”.
This view shows applications at left, in an expandable tree view. Note the moving circle indicating startup to the left of the “Cloudsoft AMP S3 Bucket” application, click the up-down chevron toggle at right to expand it; this will show the “S3 Bucket Terraform Template” child node. Click on that to focus on it and go to the “Activities” tab at the right; this will show details of all the tasks AMP is invoking to start this service. Part of AMP’s duty is to provide consistent orchestration and visibility, both for deployment and in-life operations. Even with a single, small terraform, there are a few steps automated by AMP, to configure the backend, initialize, plan, apply, and refresh, but the real benefits will come in subsequent deployments where deployments are more complex and we add in-life management. These will use the same concepts being introduced in this simpler application.
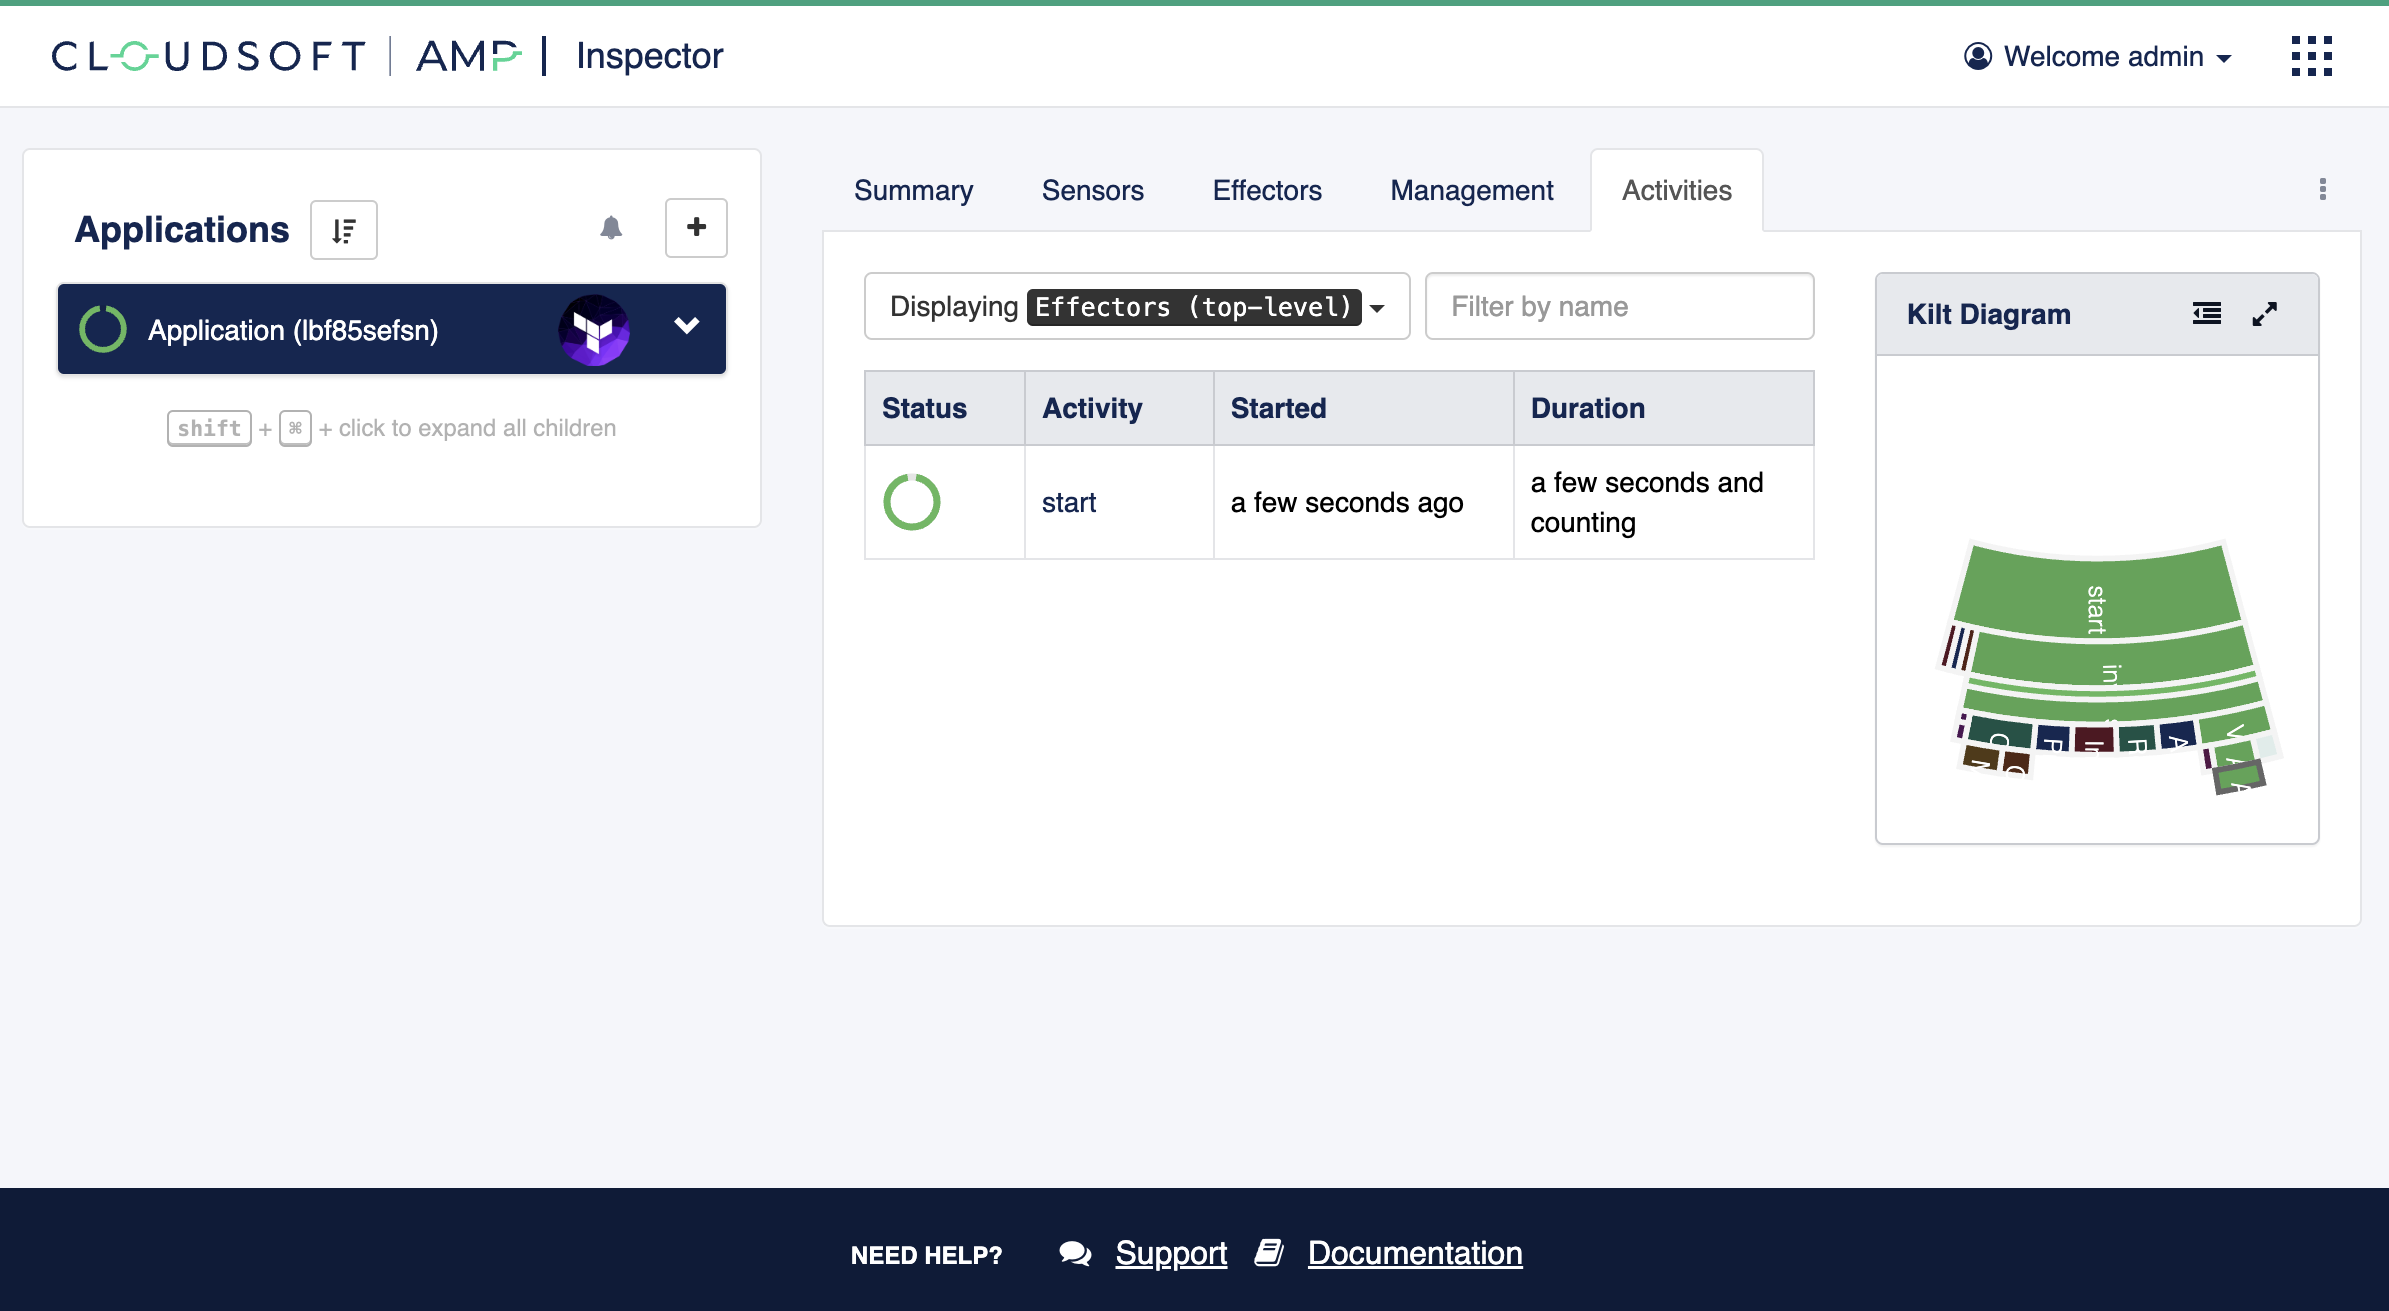
The activity tab shows a list of the top-level tasks and a hierarchical Progress Map (“kilt diagram”) showing all the descendant tasks being managed by AMP, along with their status. You can hover over these tasks to see details. Bright green shows what is active, dark colors are completed, and pastel colors are yet to be run.
Locate the “Applying terraform plan” task (underneath “Start” -> “Verify and apply
terraform” -> “Apply (. . .)” -> “Applying terraform plan”), either via the list of tasks or via the Progress Map diagram. This
may take a minute to appear, and it will start once initialization is complete. Once running, the streams associated to
this task will update in real time, including the “stdout” from the terraform apply.
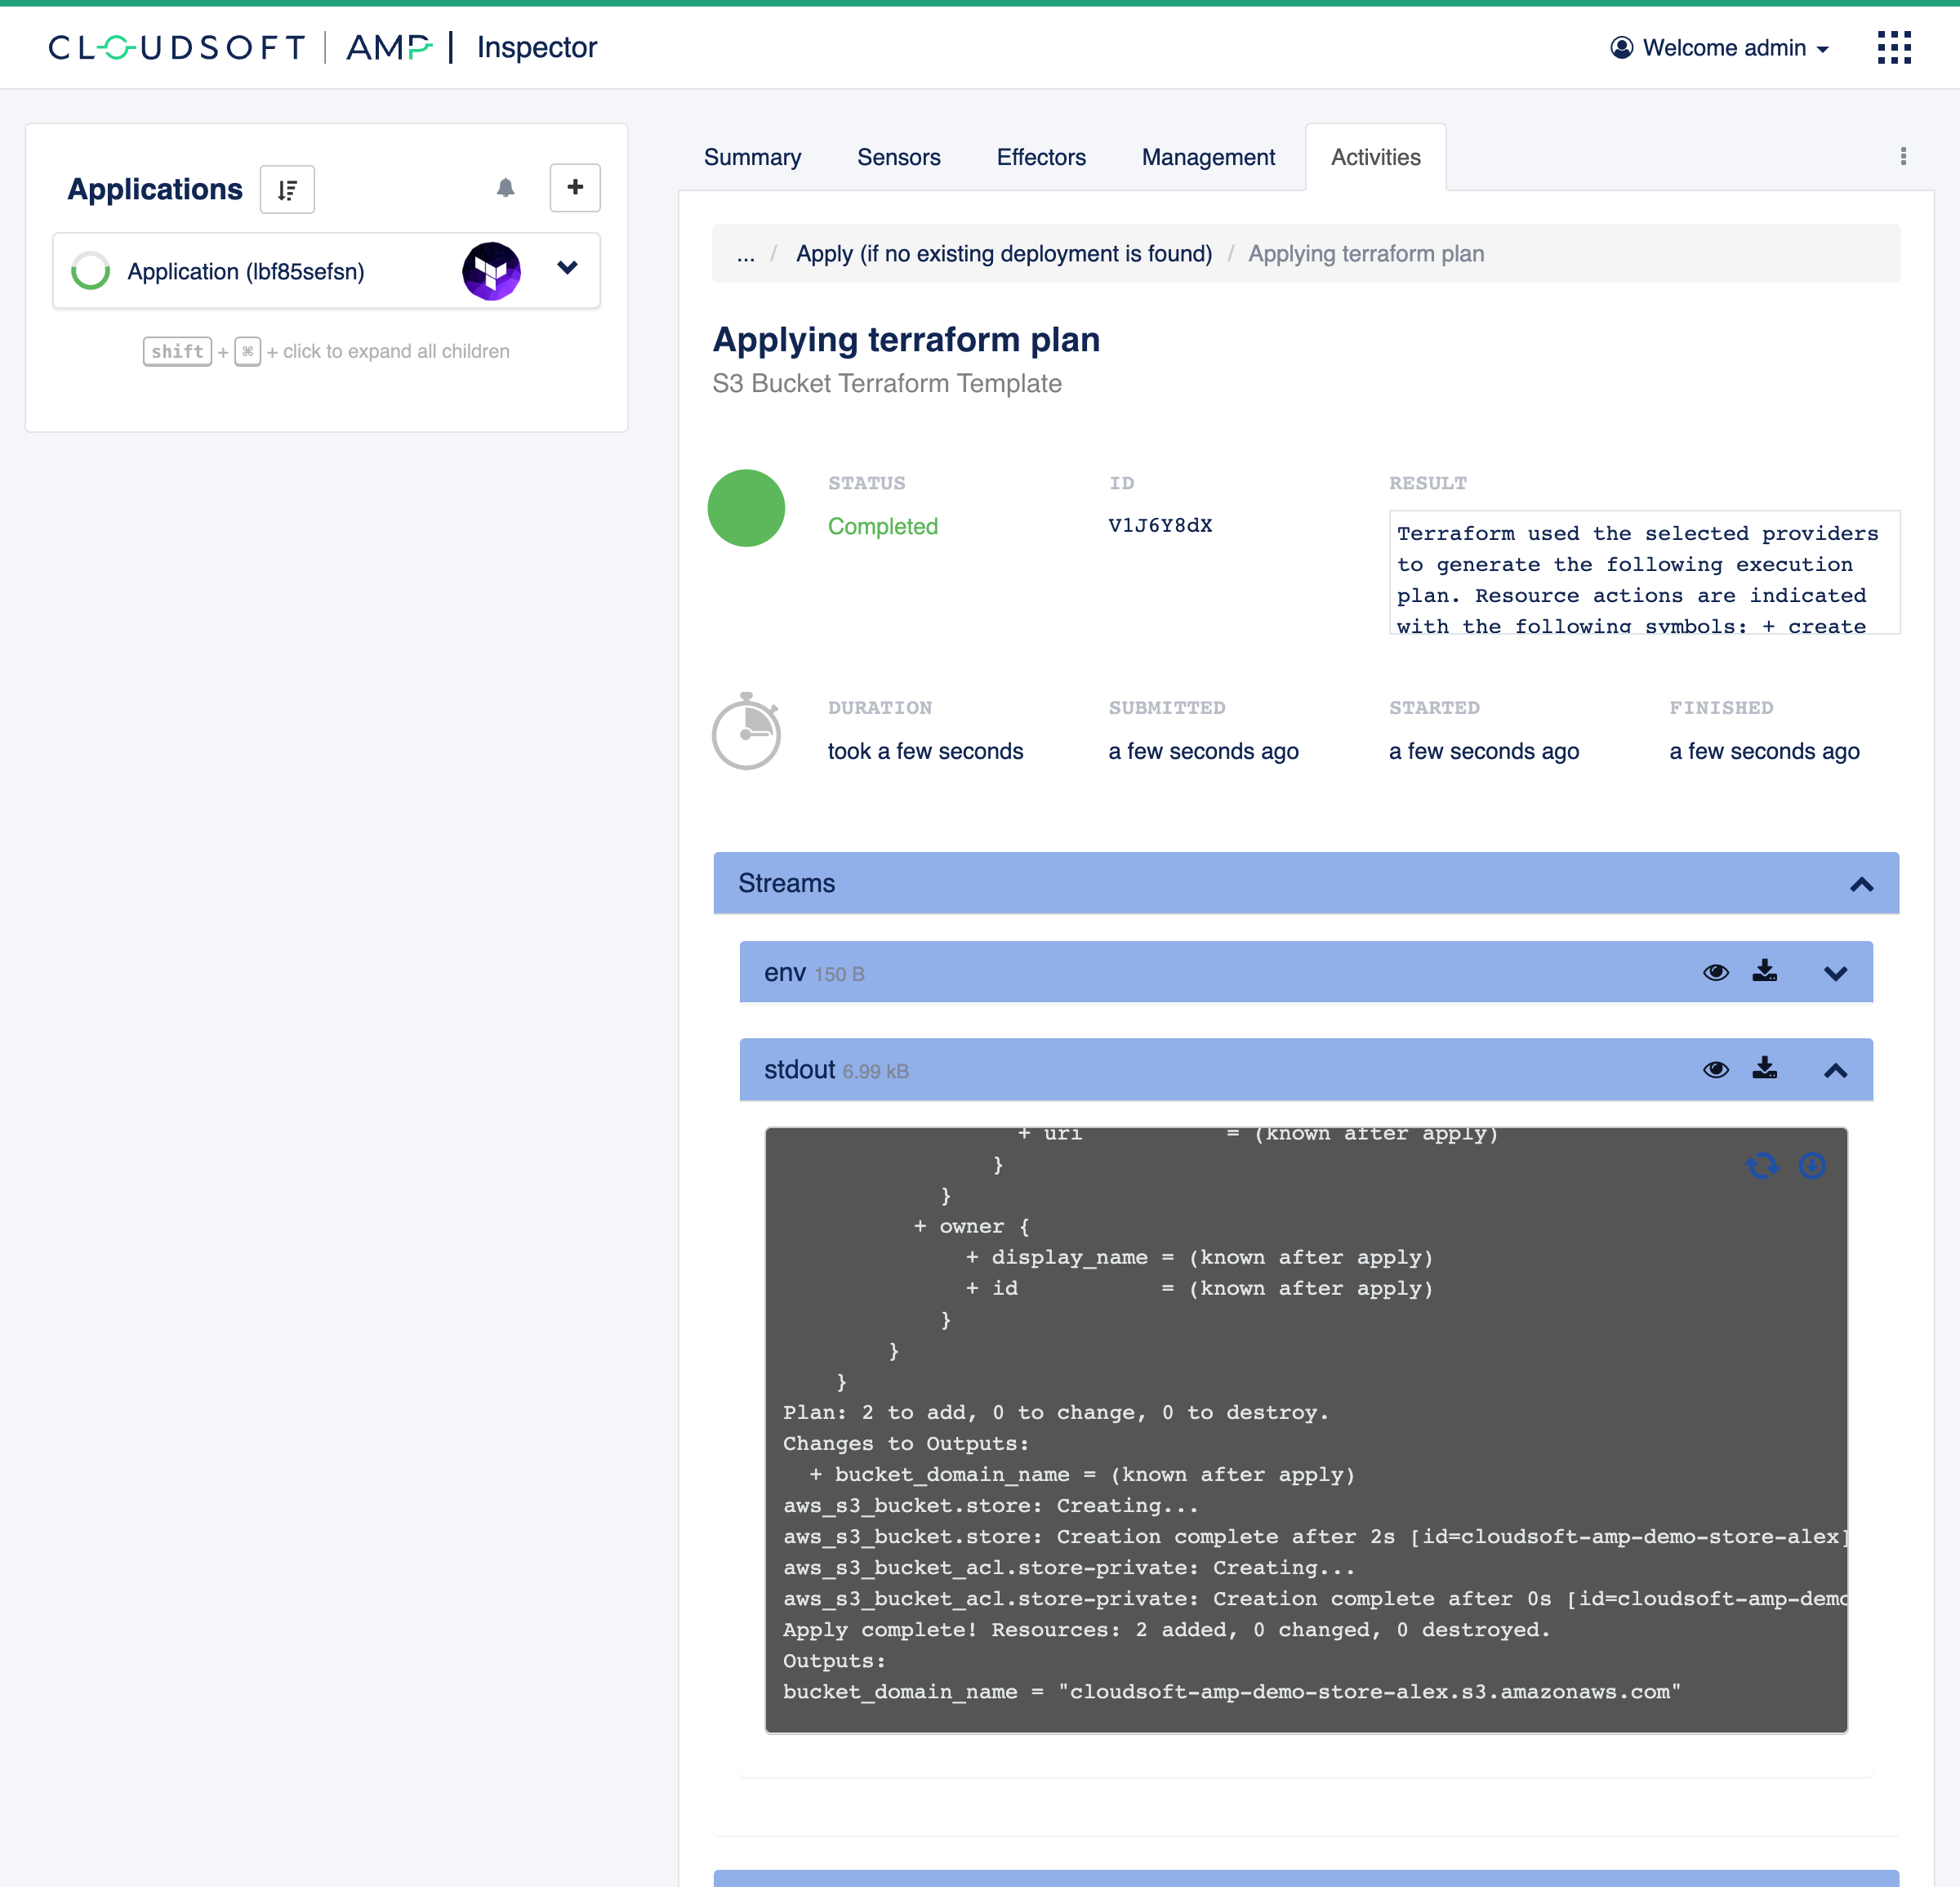
Have a cup of coffee, watching the terraform apply output and other tasks if interested,
until the circle next to the application in the tree-view stops moving, becoming a green circle indicating success.
 If the deployment doesn’t succeed and go green
⌃
When successful, AMP will have additional entities in the Inspector tree-view,
visible by expanding the “S3 Bucket Terraform Template” node.
All the Terraform-created resources are pulled in and shown in AMP;
in this case the aws_s3_bucket and its access control list (ACL) should be detected.
Click on the aws_s3_bucket.store resource and open the “Sensors” tab. “Sensors” is the autonomic computing term used by
AMP to show information detected about the elements it manages. For the S3 bucket, this includes the AWS ARN, the domain
name, and various other information retrieved by Terraform (and often from other sources too, as we will see).
Next click on the parent entity, the “S3 Bucket Terraform Template”, to view its sensors. This includes the outputs
from Terraform, prefixed with tf.output.. You should see tf.output.bucket_domain_name containing the domain name,
promoted to be available at this level for easy consistent access.
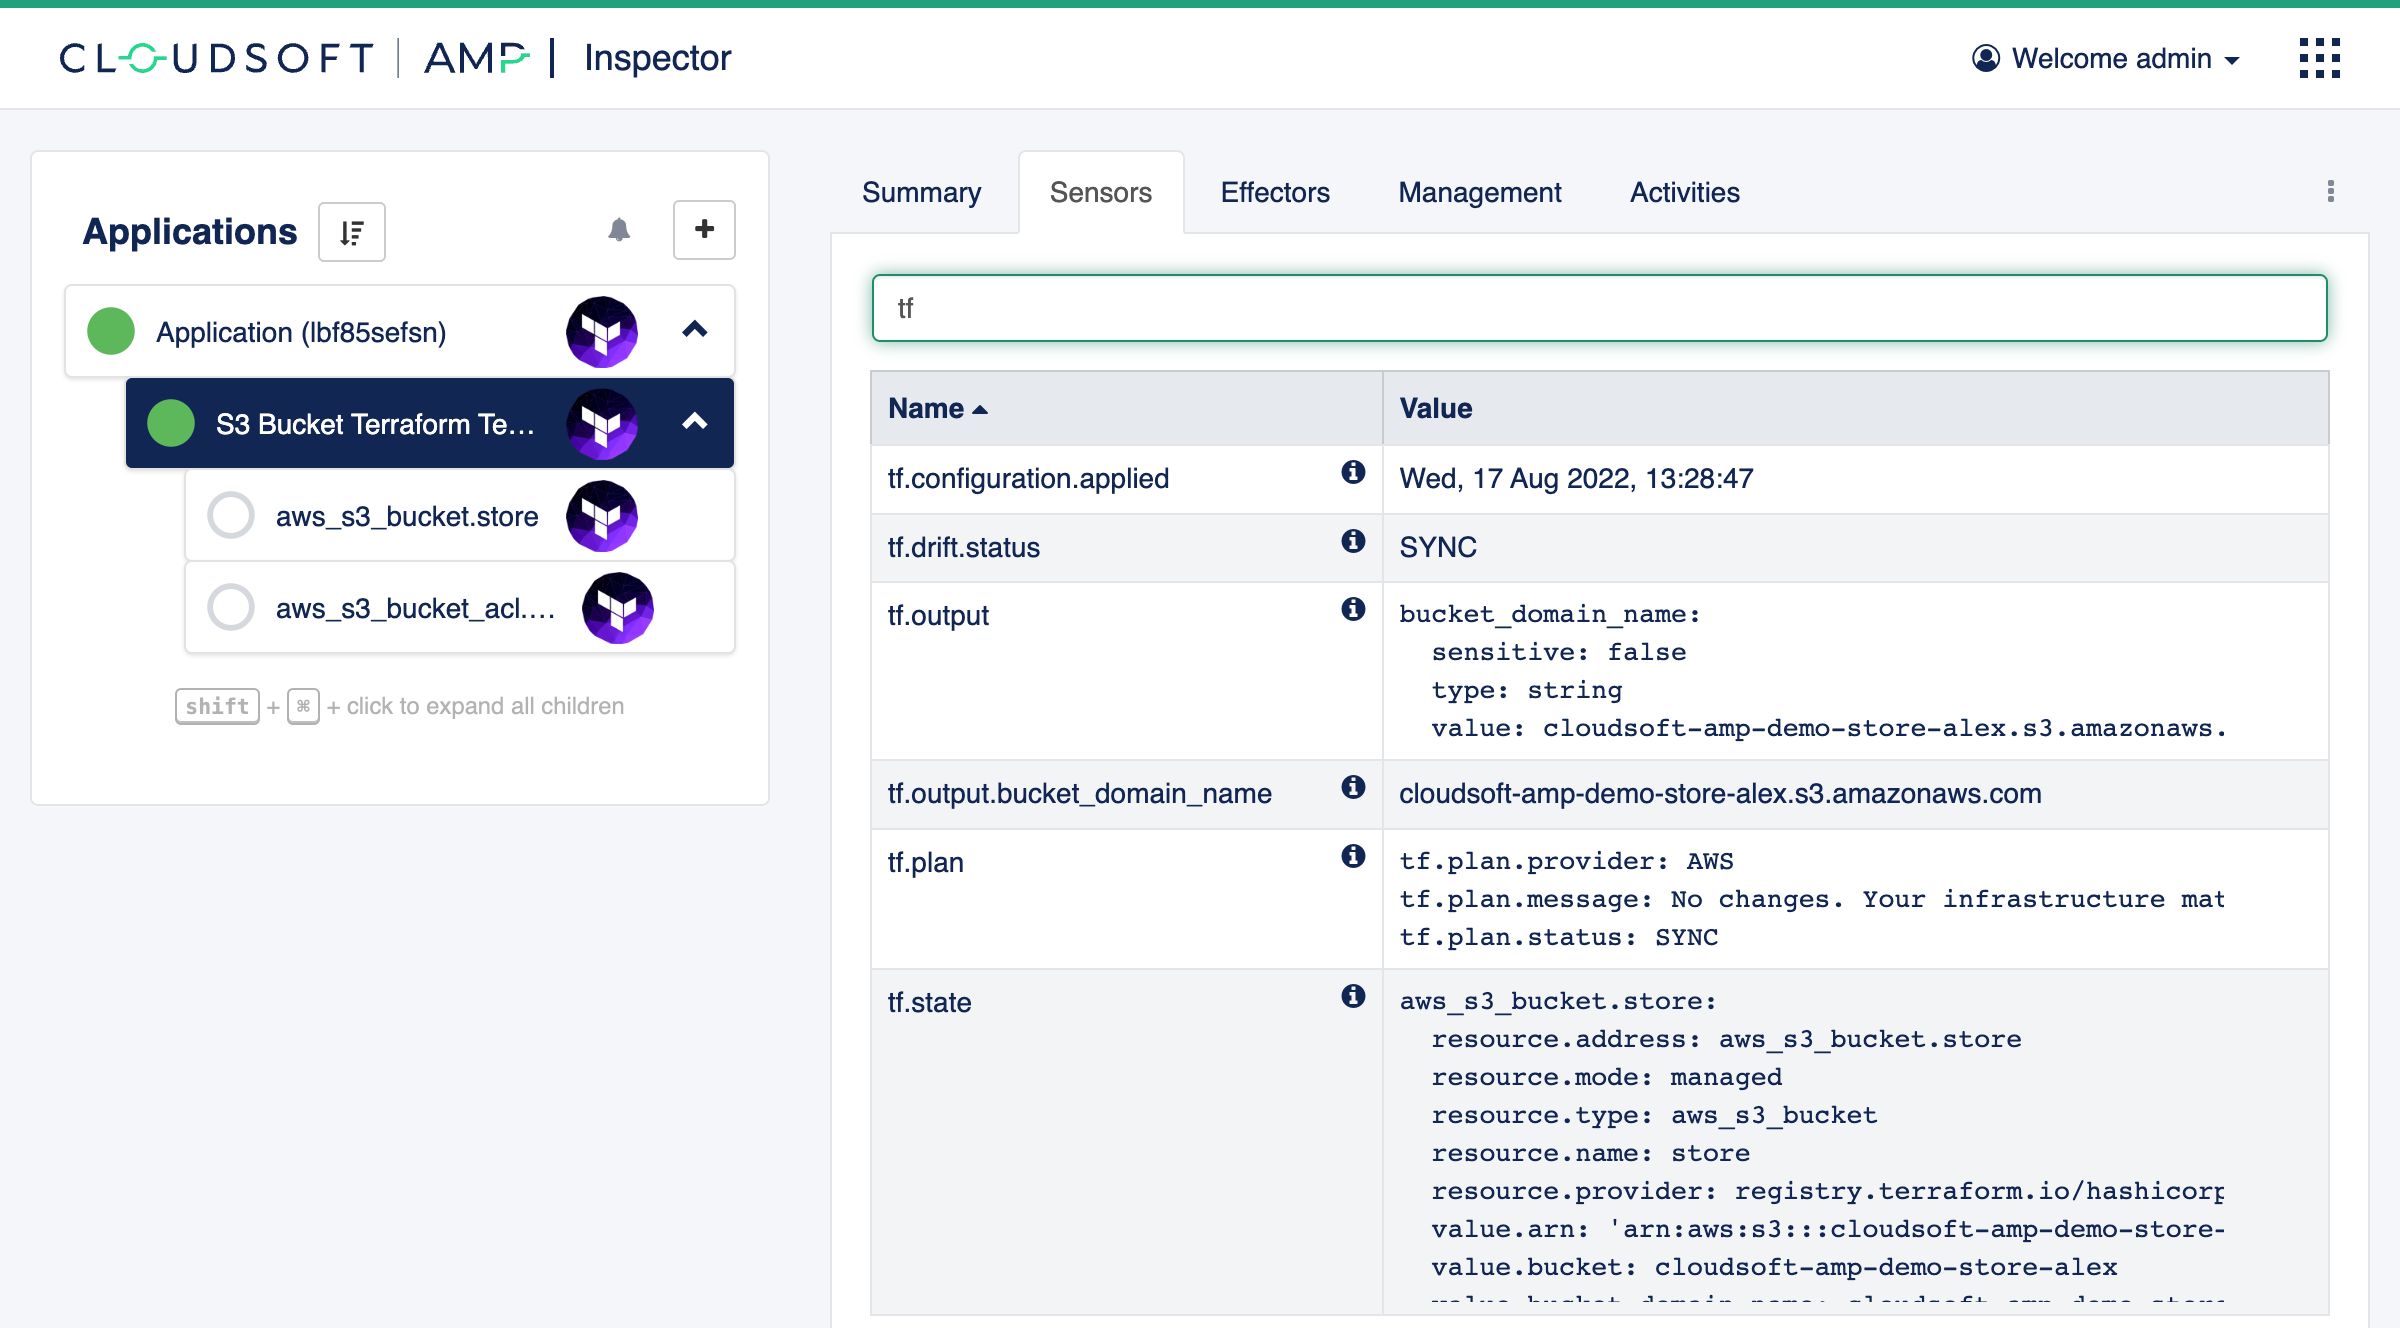
There are also “Effectors” – operations – available on all the entity nodes. If we want to destroy the Terraform, you can click “Stop” on that service. Clicking “Stop” on the root application will destroy everything. Here, however, we want to keep it as we will use this bucket as our terraform backend store for subsequent parts of this exercise.
Finally, there is the “Management” tab, showing the management operations (“policies”) performed by Cloudsoft AMP. This is not doing much yet, but shortly we will do much more with custom effectors, sensors, and management logic.
Well done!
This exercise has introduced the basic AMP components and concepts. The next exercise will show how blueprints can be combined and AMP management concepts used for a three-tier web app.