3-1 Creating EFS storage with a bastion server
Let’s now drill down into the Amazon Elastic File System (EFS) blueprint used in the previous exercise. This time we will look at each of the individual parts so you will learn how to write blueprints, building up to how Cloudsoft AMP can reuse and combine blueprints, including Terraform templates, giving a clean separation of concerns for management.
This exercise will take about an hour and will re-use the S3 bucket created in the first exercise.
The pattern we will deploy creates an EFS volume and – separately – a “bastion” server which has this volume mounted. We use the bastion server so we can connect via SSH and work with the EFS content. By making the EFS bastion server a separate Terraform template, we can more easily control its lifecycle separately, for example: turning it off when we don’t need it.
In this exercise, you will see how Cloudsoft AMP allows you to:
- Work with multiple services in AMP, in this case Terraform split into “stateless” and “stateful” deployments, although the technique applies to any combination of services split along any lines, whether cloud or on-prem, Terraform or Kubernetes or VMware
- Use a blueprint to automate the inter-dependencies between the services AMP manages
- Use effectors to control the services independently, in this case managing the lifecycle of the EFS Bastion Server separately to the EFS Volume
- Use sensors to see what is happening, e.g. how to access the Bastion Server and how much data is written
The blueprint
We start with two Terraform templates:
- The EFS Volume template contains terraform files to set up an EFS volume, encryption,
appropriate security groups, and mount points; this has no required variables, although it can be
configured with a
vpcandsubnet, and anameto uniquely identify the resources it creates in AWS - The EFS Bastion Server template contains terraform files to set up an EC2 instance
with the EFS volume mounted on it; this takes as variables details of the EFS volume to mount,
and a
nameto uniquely identify its resources in AWS
The AMP blueprint will be comprised of two entities in the services block corresponding to these two templates.
The first will use the EFS Volume Terraform code. The main differences to the previous example are
that the service points at a ZIP and it defines an id that is used by the second service:
services:
- name:                        EFS Volume
  type:                        terraform
  id:                          efs-volume
  brooklyn.config:
    tf.configuration.url:      https://docs.cloudsoft.io/tutorials/exercises/3-efs-terraform-deep-dive/3-1/efs-volume-tf.zip
The second service will use the EFS Bastion Server Terraform code, with tf_var.* config keys used to inject the
subnet, security group, and DNS name of the EFS Volume as Terraform variables. These variables are pulled from the
outputs of the first service when it is deployed. The $brooklyn DSL used here indicates it needs the values of the
corresponding attribute sensors from the efs-volume service entity. The second service will not run terraform until
these outputs are “ready” (“truthy”, i.e. non-empty and non-zero)from the first service:
- name:                        Bastion Server for accessing EFS
  type:                        terraform
  id:                          efs-bastion-server
  brooklyn.config:
    tf.configuration.url:      https://docs.cloudsoft.io/tutorials/exercises/3-efs-terraform-deep-dive/3-1/efs-server-tf.zip
    tf_var.subnet:             $brooklyn:entity("efs-volume").attributeWhenReady("tf.output.efs_access_subnet")
    tf_var.efs_security_group: $brooklyn:entity("efs-volume").attributeWhenReady("tf.output.efs_access_security_group")
    tf_var.efs_mount_dns_name: $brooklyn:entity("efs-volume").attributeWhenReady("tf.output.efs_access_mount_dns_name")
Additionally, we will define two brooklyn.parameters.
This block describes config keys used in a blueprint which are intended to be set or overridden by a consumer of a blueprint.
optionally specifying the type, a description, inheritance behavior, and constraints on a parameter.
Here we expect the user might want to customize the demo_name used by the terraform when naming AWS resources
and we require them to provide a bucket_name which we will use to tell terraform where to store its state:
brooklyn.parameters:
- name:         demo_name
  constraints:
    - required
    - regex:    '[A-Za-z0-9_-]+'

- name:         bucket_name
  constraints:
    - required
    - regex:    '[A-Za-z0-9_-]+'
The brooklyn.config token is used on many items in blueprints to configure components.
On entities, these are inherited through brooklyn.children by default,
so when applied at the root of the blueprint, it applies to all services (and their descendants).
Finally, let us define a blueprint name and the global brooklyn.config we want to apply everywhere.
The brooklyn.config defines the credentials in shell.env as before, and two new config keys, all three of which will
be inherited by both services:
tf_var.namewill pass thenamevariable to terraform, used in both Terraform templates here to uniquely namespace the resources it creates; the$brooklyn:config(...)DSL points at the value of thedemo_nameconfig parameter we just definedtf.extra.templates.contentsallows us to define additional files to pass with ourtf.configuration, using a template syntax. The construction here will place abackend.tffile in the work directory indicating whereterraformshould store its state. As you can see, this block references thebucket_nameand thedemo_name, along with${name}which will resolve to the name of each service entity where it is referenced (e.g. “EFS Volume”). This ensures that the state will be stored where we want, in cleanly separated and identifiable paths per service, and will be preserved across AMP deployments (assuming inputs are the same).
name:                            EFS with Bastion Server
brooklyn.config:
  tf_var.name:                   $brooklyn:config("demo_name")
  shell.env:
    AWS_ACCESS_KEY_ID:           $brooklyn:external("exercise-secrets", "aws-access-key-id")
    AWS_SECRET_ACCESS_KEY:       $brooklyn:external("exercise-secrets", "aws-secret-access-key")
  tf.extra.templates.contents:
    backend.tf: |
      terraform {
        backend "s3" {
          bucket = "${config.bucket_name}"
          key    = "${config.demo_name}/${name}"
          region = "eu-west-1"
        }
      }
The overall AMP blueprint can be viewed here.
 Tag your resources
⌃
 Use a network mirror
⌃
Deploying the blueprint
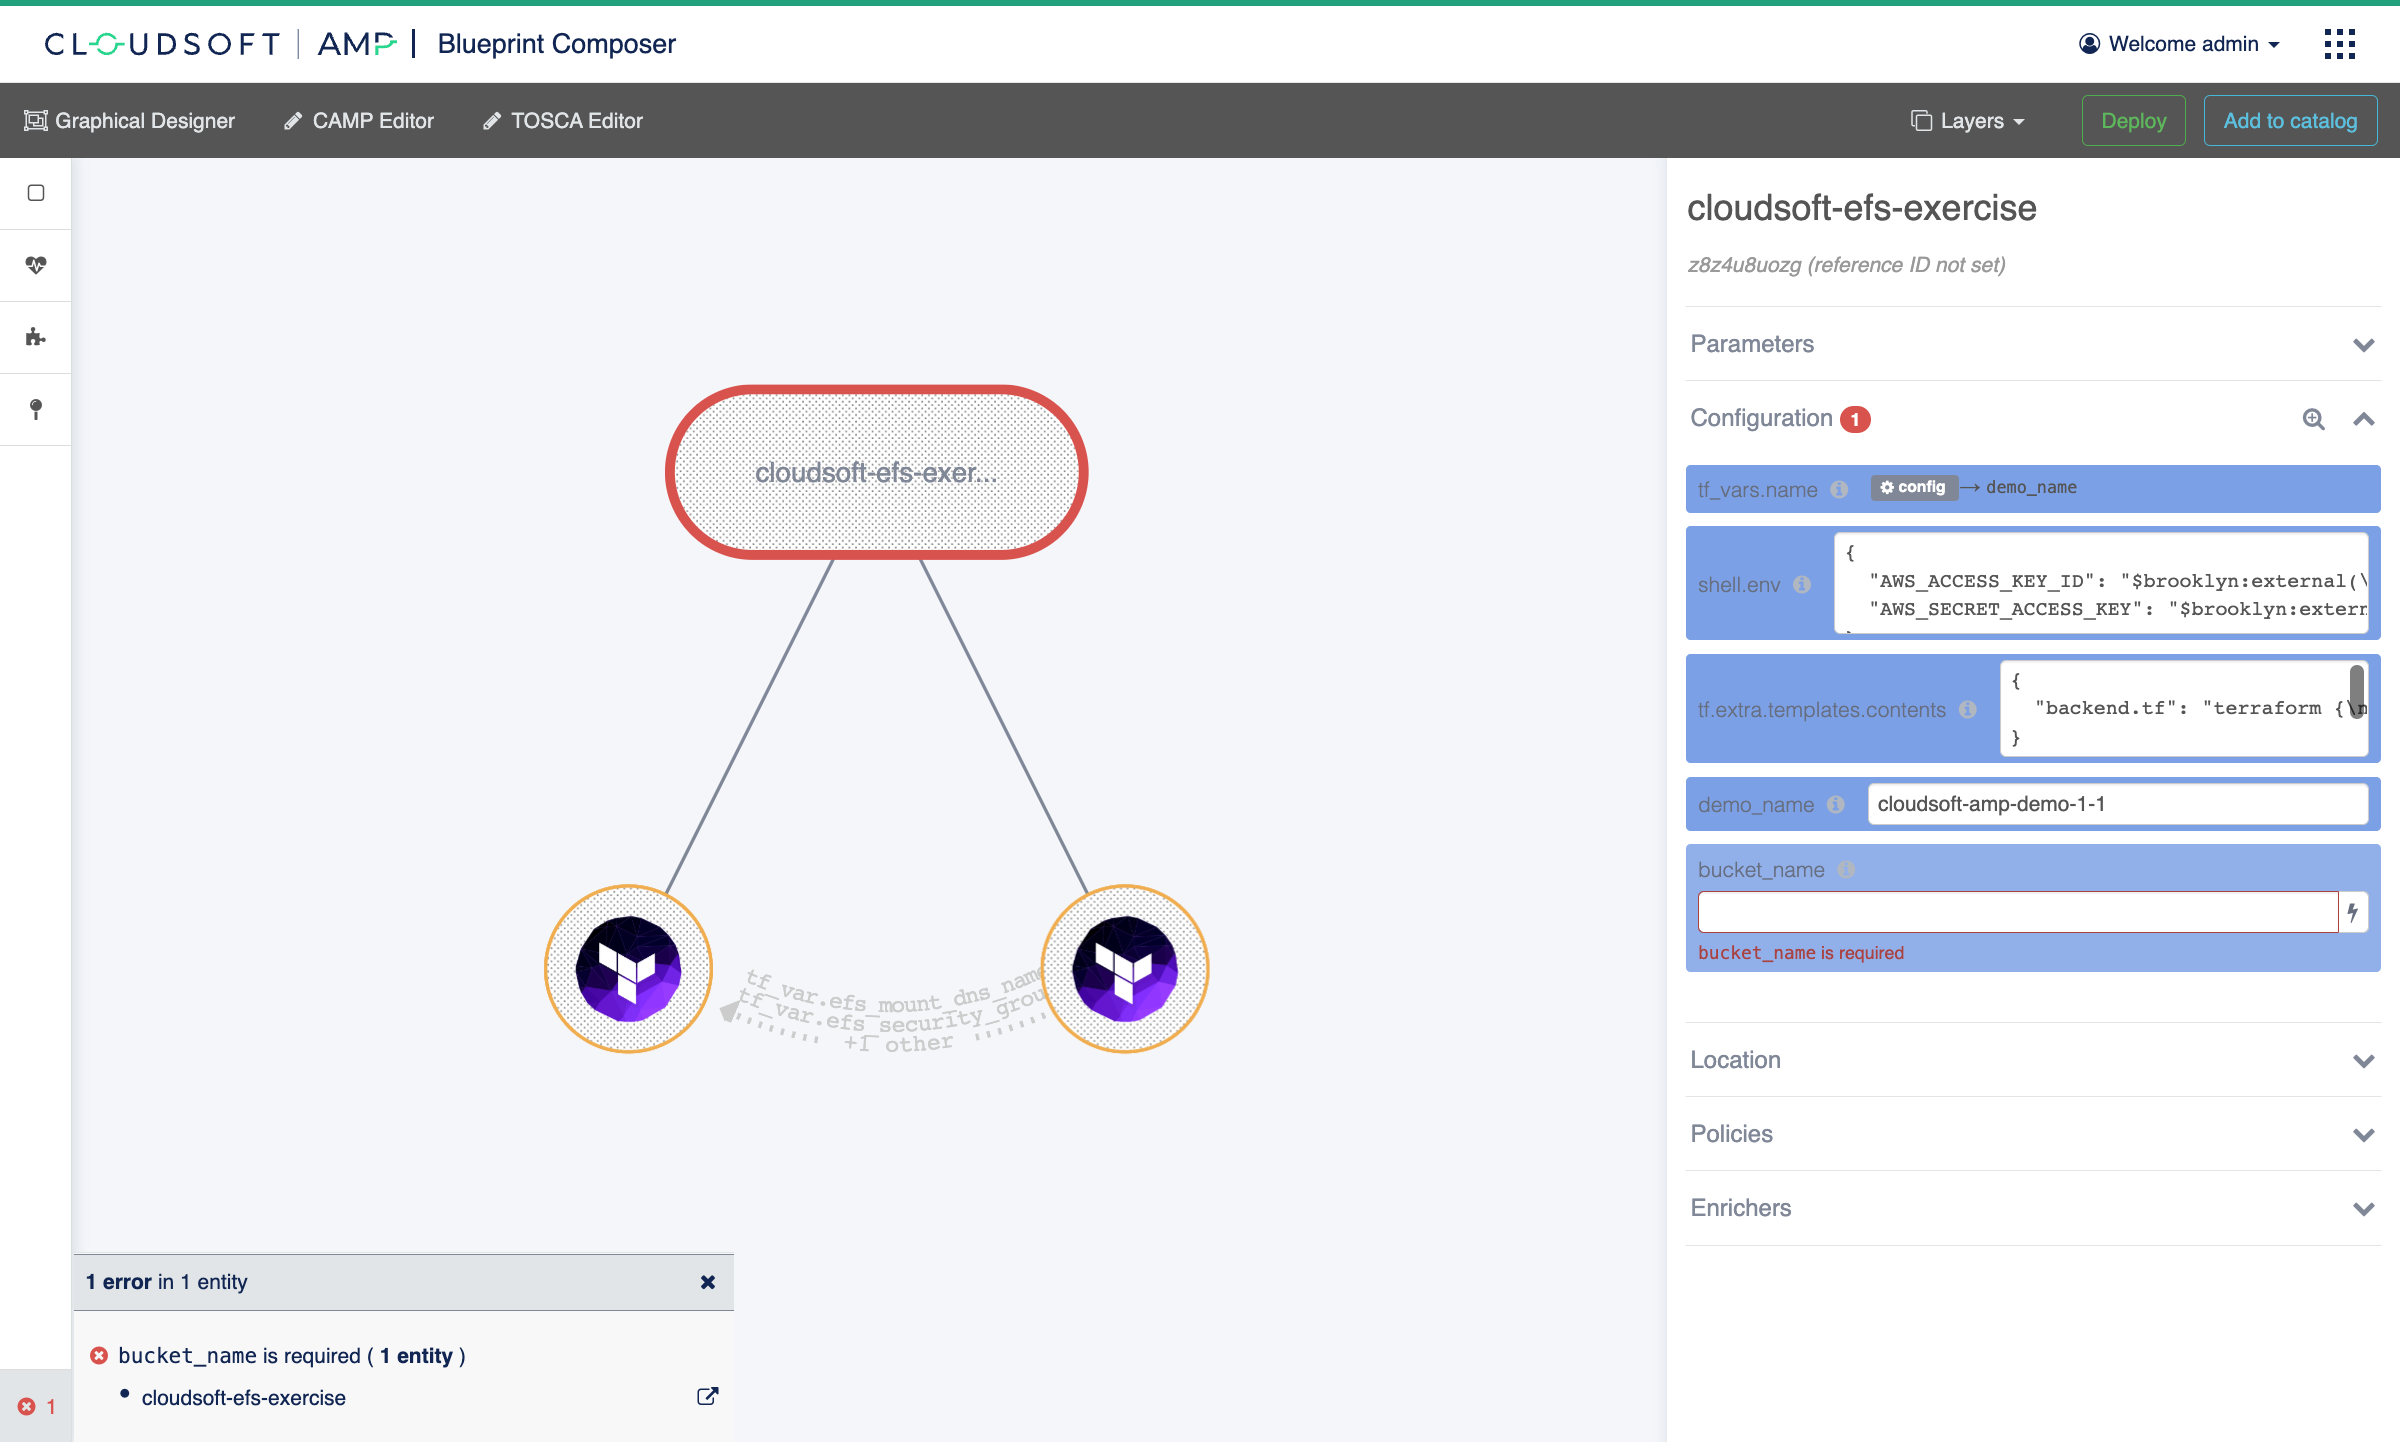
To deploy, as before, open the “Catalog” in AMP using the top-right module navigation button. Click on “Types” and search for “Cloudsoft AMP Exercise 3-1 EFS Template”. As you did for Exercise 2, you can now click to “Open” then “Deploy” then the three-lines button at the bottom of the pop-up and “Open in Composer (Expanded)”.

Then in the Composer, as before:
- Set the
bucket_nameconfiguration equal to the name of the S3 bucket to store Terraform state, created in Exercise 1 - Set the
demo_nameto a recognizable name so that resources created in AWS are easily identified - Click “Deploy” and confirm
 Installing the type manually
⌃
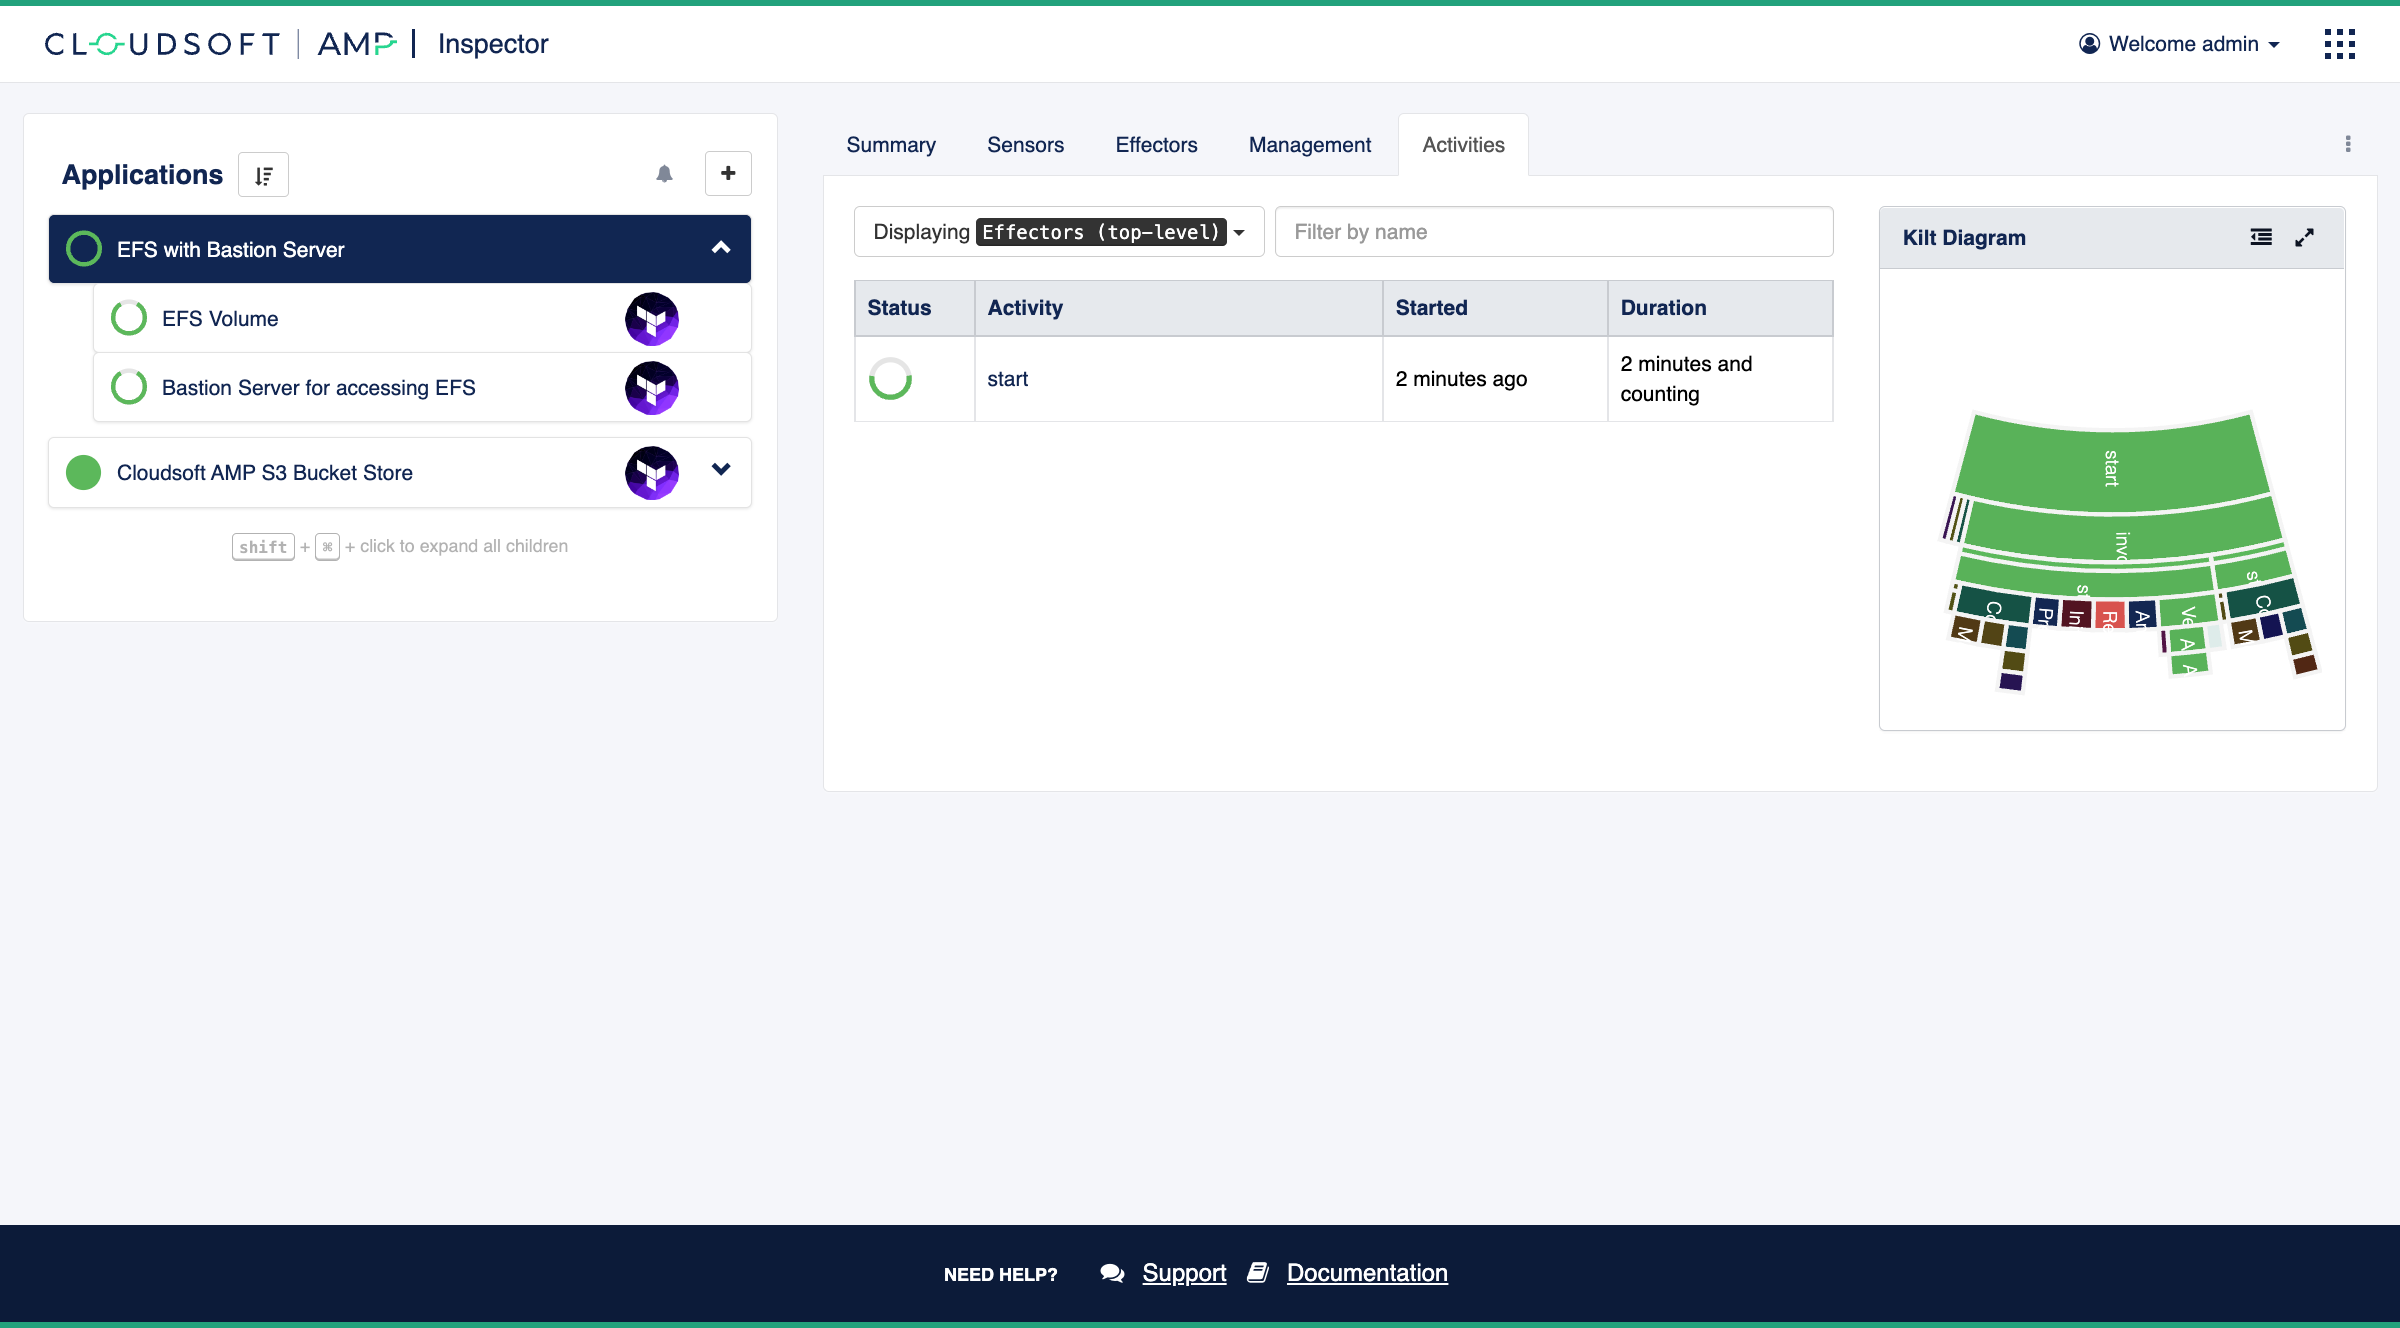
Once deployed, go to the Inspector and expand the “EFS with Bastion Server” application to see the components. You should see the two services in a starting state in AMP. The for “EFS Volume” terraform will run first, taking a few minutes, and once the outputs needed by the “Bastion Server” are available, its terraform will run. You can follow this progress in the Activities tab and the Sensors tab, including why the Bastion Server is blocked and when it is unblocked, or take a short break until the entire deployment completes, usually within five or ten minutes.

Managing infrastructure
Once infrastructure is fully deployed, let’s use our EFS bastion server to modify the contents of the EFS.
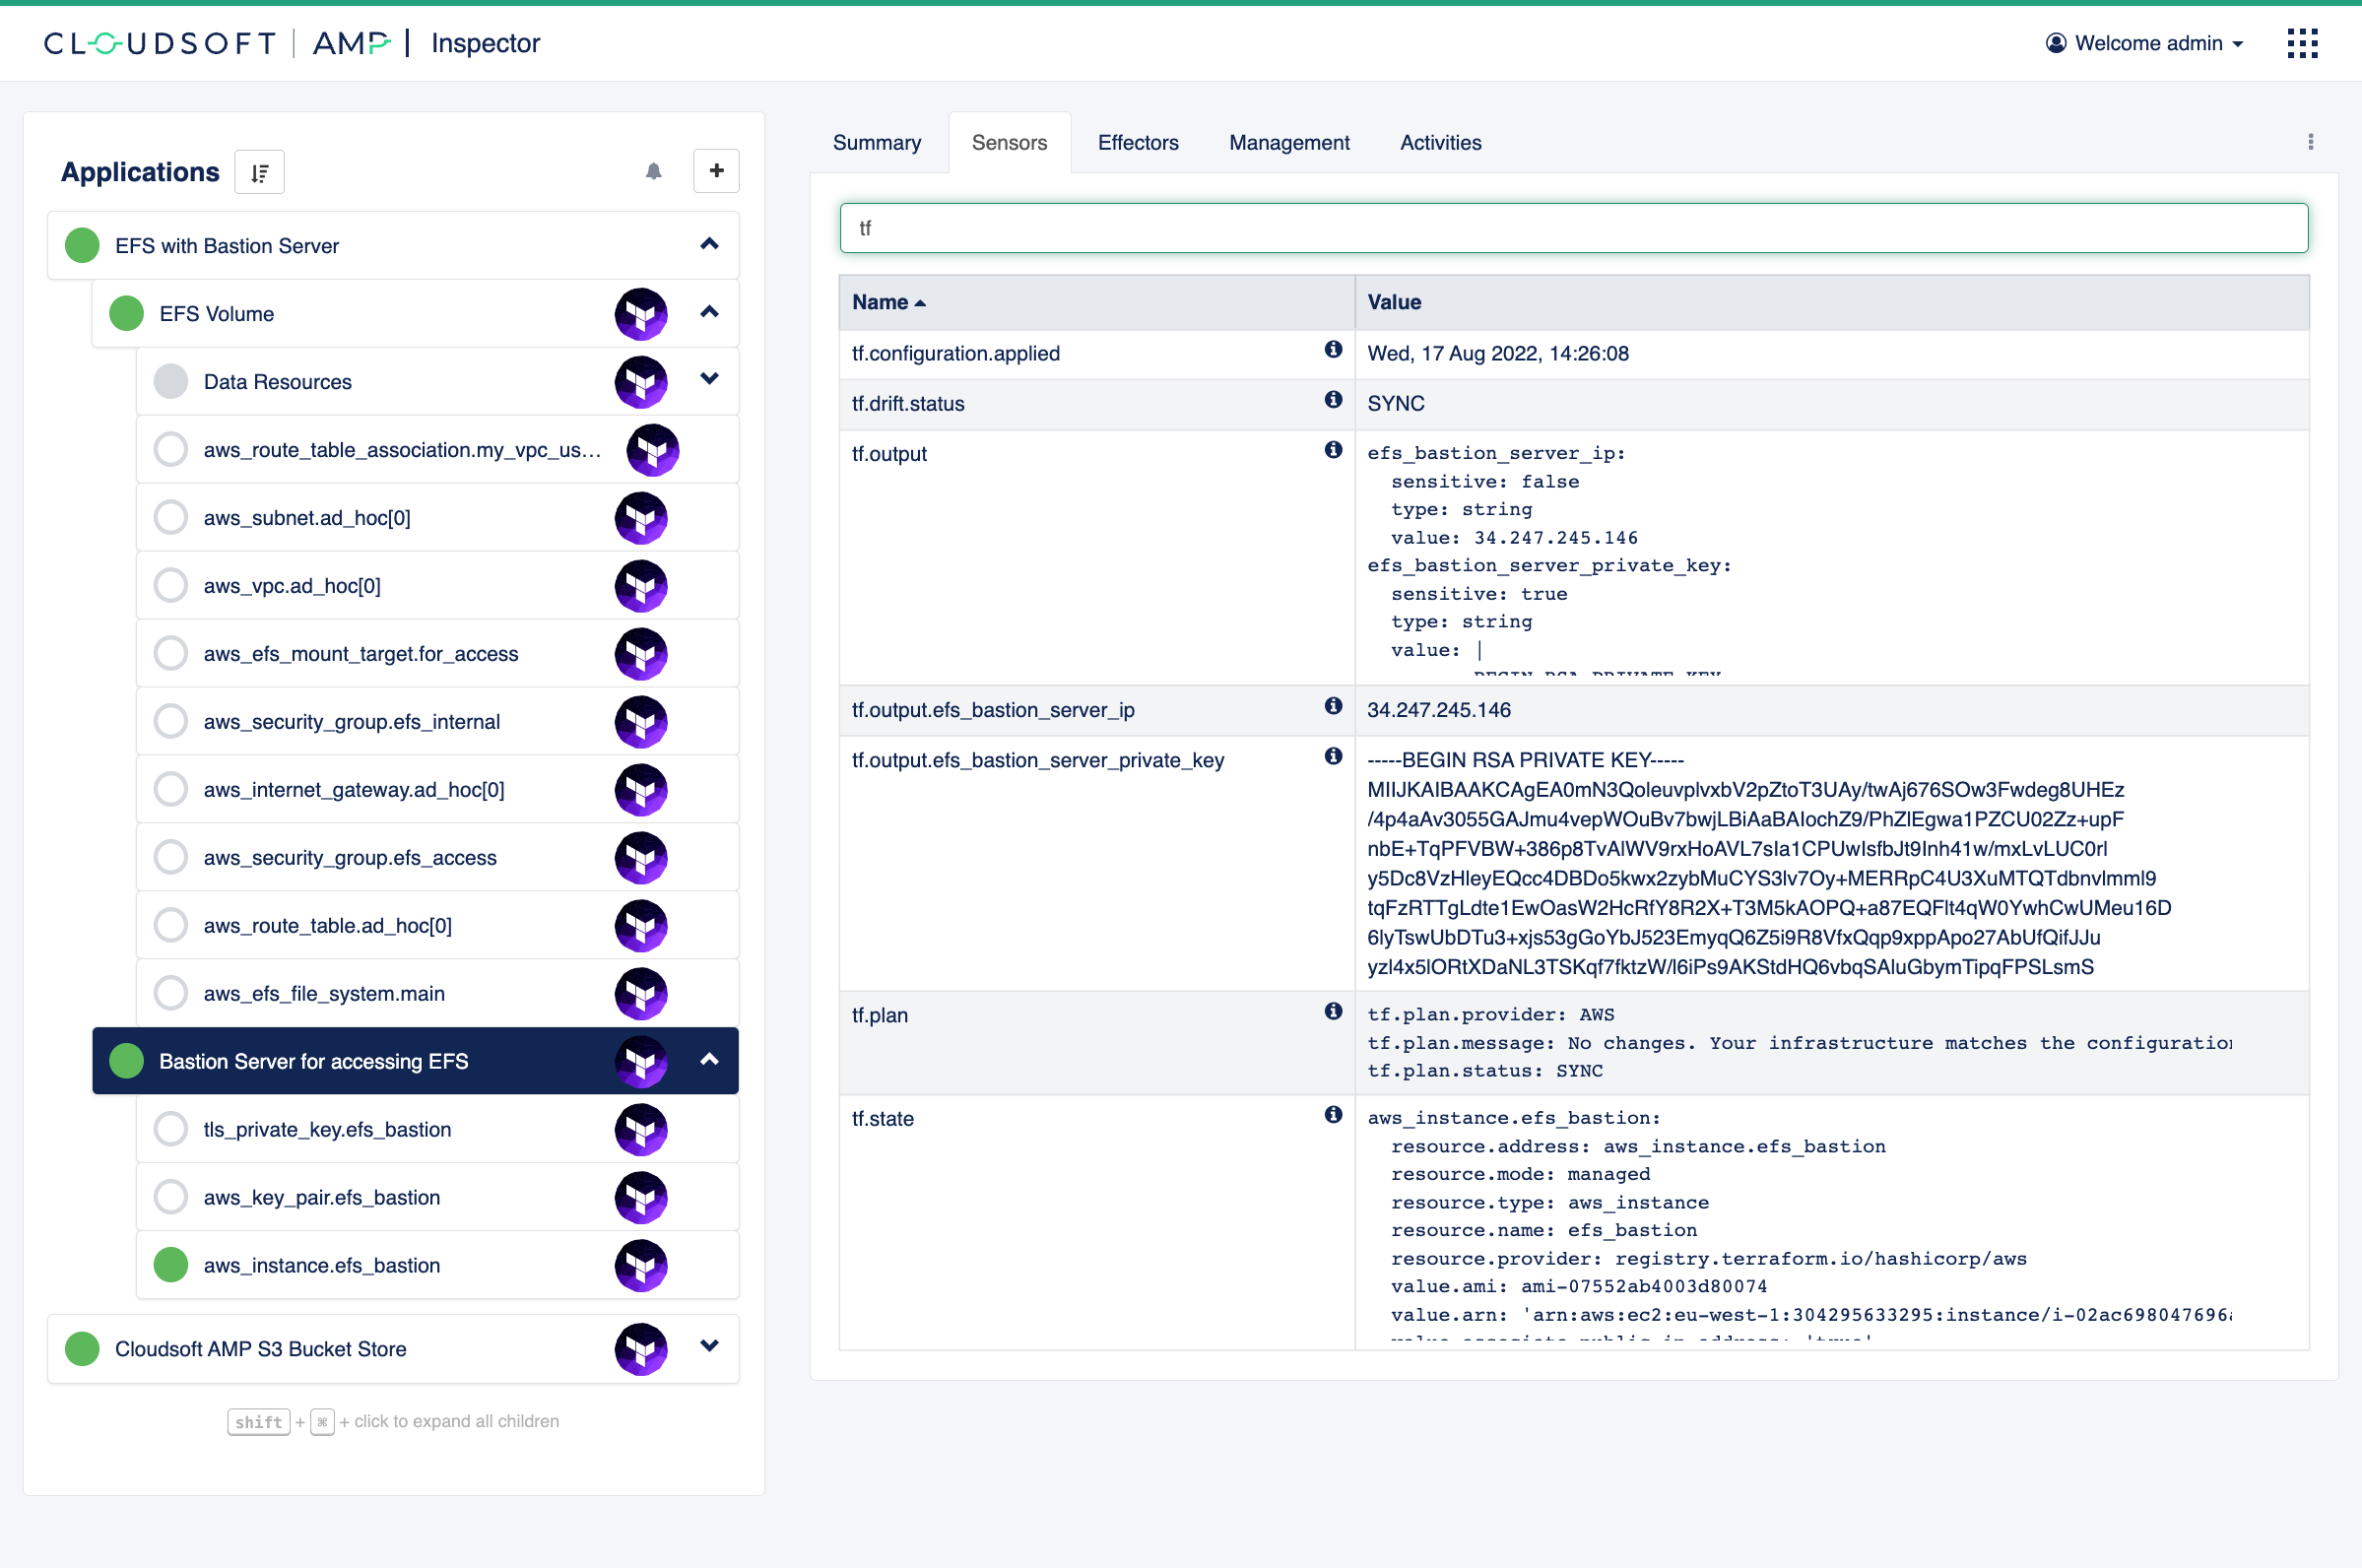
Navigate to the “Sensors” on the “Bastion Server for accessing EFS” and note the
tf.output.efs_bastion_server_private_key and
tf.output.efs_bastion_server_ip sensors.
If you hover over the value, it will offer a button at right to copy to clipboard.

Create a file, say efs_server_id_rsa, with the content of tf.output.efs_bastion_server_private_key sensor,
a private RSA SSH key created for accessing this server.
Set the permissions so no one else can view it:
chmod 600 efs_server_id_rsa
You can then connect to the EFS bastion server via SSH as follows (replacing <IP_ADDRESS> with the value
of tf.output.efs_bastion_server_ip sensor):
ssh -i efs_server_id_rsa -o HostKeyAlgorithms=ecdsa-sha2-nistp256 ec2-user@<IP_ADDRESS>
Create some content in the mounted EFS volume on the server:
cd /mnt/shared-file-system

# a sample message to confirm this data was written
echo hello world > test.txt

# create a big file, here 20M means 20 megabytes, costing about a penny a year
# (you can change to any size; we will refer to this size in the next exercise)
dd if=/dev/random of=./big-file.bin bs=4k iflag=fullblock,count_bytes count=20M
Next let’s assume we are done with the EFS setup. The model that AMP keeps of our application gives us a handy way not just to observe the Terraform deployments, but also to control them. Navigate to the effectors tab on the “Bastion Server for accessing EFS” entity and click “stop”. This will tear down cloud resources created for the EFS bastion server only. Leave the “EFS Volume” running.
Once “Bastion Server for accessing EFS” is fully stopped, let’s start it again by clicking the “start” effector, to confirm that the “EFS Volume” operates as per its purpose.
When “Bastion Server for accessing EFS” is re-deployed, look up tf.output.efs_bastion_server_private_key and
tf.output.efs_bastion_server_ip sensors again (this is a new deployment), update contents of efs_server_id_rsa file
with a new key data, and run the following with updated <IP_ADDRESS>:
ssh -i efs_server_id_rsa -o HostKeyAlgorithms=ecdsa-sha2-nistp256 ec2-user@<IP_ADDRESS> cat /mnt/shared-file-system/test.txt
You should see hello world.
 Custom sensors and secure keys
⌃
 Deploy your own blueprints
⌃
Recap
This exercise has shown how to define an AMP blueprint which combines and configures
two Terraform templates,
including an introduction to global brooklyn.config, DSL references, and environment variables.
It has also gone deeper into the runtime view that Cloudsoft AMP can provide,
showing details of the orchestration of components AMP manages.
In the the next exercise you will learn more about how AMP helps with the management of deployments, including automation through custom sensors and effectors and dynamic grouping of entities. The exercise after that will show the development of “policies”, including automated drift detection and custom compliance rules, blue-green updates of applications from version control, and integrating with CI/CD pipelines, all with an aim of facilitating collaboration and reliability.
To save time in the next exercises, you can keep the current deployments active.